Zone-2 training has quietly become the worst-kept secret among endurance athletes, biohackers, and anyone serious about building a robust aerobic engine. Unlike high-intensity intervals that leave you gasping, zone-2 work is that deceptively simple, conversational pace where magic happens—mitochondria multiply, fat oxidation optimizes, and your cardiovascular system remodels itself. But here’s the catch: zone-2 is a razor-thin target, typically just 60-70% of your maximum heart rate, and missing it by even 10 beats can mean the difference between building your aerobic base and just going through the motions. That’s why an upright bike with reliable heart-rate telemetry isn’t just a nice-to-have; it’s your scientific instrument for metabolic transformation.
The market is flooded with cardio equipment promising “heart-rate training,” but few upright bikes deliver the precision, consistency, and user experience that zone-2 work demands. You need more than a flickering number on a screen—you need stable connectivity, minimal signal dropout, intuitive zone-based programming, and a ride feel smooth enough to maintain that steady-state effort for 60-90 minutes without mechanical distraction. This guide cuts through the marketing noise to arm you with the technical knowledge to evaluate any upright bike’s heart-rate telemetry system and overall suitability for the specific demands of zone-2 training.
Top 10 Upright Bikes with Heart-Rate Telemetry
Detailed Product Reviews
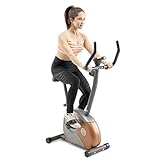
1. Schwinn Fitness 130 Upright Bike

Overview: The Schwinn Fitness 130 Upright Bike positions itself as a connected home cardio solution at a mid-range price point. This bike targets tech-savvy users who want app integration without breaking the bank, offering enhanced Bluetooth connectivity that syncs with popular tracking platforms like Explore the World and Zwift for immersive virtual rides.
What Makes It Stand Out: The standout feature is its dual-app compatibility, offering access to 40+ global routes via Explore the World and 1,000+ structured workouts through Zwift. The 5.5" LCD display provides 13 workout programs, while 16 levels of magnetic resistance deliver versatile intensity options for varied fitness levels.
Value for Money: At $449, this bike sits in the sweet spot between basic models and premium options. While Zwift and Explore the World require separate subscriptions, the hardware itself offers substantial connectivity that competitors often reserve for higher-priced models. It’s an investment in interactive training without the four-figure price tag.
Strengths and Weaknesses: Strengths: Excellent app integration, 16 resistance levels, compact upright design, reputable brand heritage Weaknesses: Small 5.5" screen, subscription costs add up, limited built-in programs compared to commercial models, no horizontal seat adjustment mentioned
Bottom Line: The Schwinn 130 is ideal for home users seeking digital motivation and variety. If you already use fitness apps or plan to, this bike delivers exceptional connectivity value. However, those wanting a larger display or all-inclusive experience should consider alternatives.
2. Horizon Fitness 5.0U Upright Bike, Fitness & Cardio, Magnetic Resistance Cycle with Bluetooth, Padded Seat, Step-through Frame, and 300lb Weight Capacity

Overview: The Horizon Fitness 5.0U Upright Bike emphasizes accessibility and comfort for home users. Its step-through frame design eliminates the mounting challenge of traditional upright bikes, making it particularly appealing for seniors, those with mobility limitations, or anyone prioritizing convenience.
What Makes It Stand Out: The combination of step-through accessibility and multi-directional seat adjustment sets this bike apart. The 15.4-pound aluminum flywheel ensures a smooth, quiet ride, while Bluetooth FTMS technology offers universal app compatibility beyond proprietary systems. At only 87 pounds with transport wheels, it’s notably mobile for its class.
Value for Money: Priced at $501.15, it commands a slight premium over entry-level models but justifies the cost through thoughtful ergonomics and build quality. The flexible app connectivity means you’re not locked into a single ecosystem, potentially saving subscription costs long-term. The 300-pound weight capacity indicates robust construction.
Strengths and Weaknesses: Strengths: Step-through frame, four-way seat adjustment, lightweight and portable, universal Bluetooth connectivity, premium cooling fan Weaknesses: Higher price than basic models, limited built-in programs, smaller flywheel than some competitors, no mention of heart rate telemetry
Bottom Line: This bike excels for users who value accessibility and flexibility. The step-through design and app-agnostic connectivity make it a smart choice for multi-user households. If mounting a traditional bike is inconvenient or you want freedom from single-app ecosystems, the Horizon 5.0U justifies its modest premium.
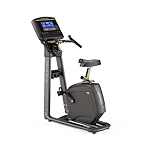
3. Precor UBK 815 Commercial Upright Exercise Bike with P10 Console

Overview: The Precor UBK 815 represents commercial-grade quality adapted for discerning home users or light commercial facilities. Built to withstand continuous daily use in fitness centers worldwide, this bike prioritizes durability and biomechanical precision over flashy tech features.
What Makes It Stand Out: The commercial construction is evident in its 160-pound weight and 10-year frame warranty. Ergonomic, over-molded handlebars with three distinct riding positions and a fully adjustable seat provide gym-quality comfort. The 25 resistance levels offer finer incremental control than consumer models, while built-in heart rate monitoring includes both touch sensors and telemetry compatibility.
Value for Money: At $2,145, this is a serious investment, but commercial-grade equipment typically costs $3,000+. You’re paying for longevity, stability, and proven durability. For home users who ride daily or for apartment complexes and office gyms, the total cost of ownership over a decade makes economic sense compared to replacing cheaper models.
Strengths and Weaknesses: Strengths: Commercial-grade durability, extensive warranty, 25 resistance levels, ergonomic design, dual heart rate monitoring, stable at high intensity Weaknesses: Price prohibitive for casual users, only six programs, no Bluetooth/app connectivity, heavy and difficult to move
Bottom Line: The Precor UBK 815 suits serious athletes and commercial operators who prioritize equipment longevity over digital features. If you want a “buy it for life” bike that feels like your health club’s equipment, this is your choice. Tech-focused users should look elsewhere.
4. Niceday Recumbent Exercise Bike, Recumbent Bike for Home, Recumbent Stationary Bike 400LBS Weight Capacity, Magnetic Recumbent Bike with Smart APP, LCD Monitor, Heart Rate Handle
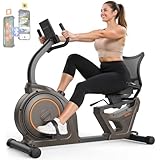
Overview: The Niceday Recumbent Bike targets a specific niche: users requiring therapeutic, low-impact exercise with exceptional weight capacity. Its recumbent design dramatically reduces spinal loading and joint stress, making it ideal for rehabilitation, seniors, or plus-size individuals beginning their fitness journey.
What Makes It Stand Out: The 400-pound weight capacity is class-leading at this price point. Combined with a recumbent position and 16-level progressive resistance controlled by a mechanical knob, it serves both physical therapy needs and general cardio. The 15-pound flywheel with magnetic resistance ensures whisper-quiet operation—crucial for harmonious home use.
Value for Money: At $359.99, this represents outstanding value. Comparable recumbent bikes with 400-pound capacity often exceed $600. While it lacks advanced tech features, it delivers where it matters: stability, accessibility, and therapeutic design. The smart app connectivity is a welcome bonus, not the main selling point.
Strengths and Weaknesses: Strengths: 400lb weight capacity, therapeutic recumbent design, quiet operation, excellent price point, heart rate handles, customer service commitment Weaknesses: Basic LCD display, less intense workouts than upright bikes, larger footprint, mechanical resistance knob may feel dated to some
Bottom Line: Perfect for users prioritizing joint protection and stability over high-intensity training. If you’re recovering from surgery, managing arthritis, or need a plus-size-friendly option, this bike is unbeatable value. Fit athletes seeking vigorous workouts should consider upright models instead.
5. Star Trac S-UBx Upright Bike
Overview: The Star Trac S-UBx represents premium commercial upright bike engineering with a focus on user experience and entertainment integration. Designed for health clubs and high-end home gyms, it combines robust construction with thoughtful amenities that keep users engaged during long sessions.
What Makes It Stand Out: The optional S Series entertainment system with 15-inch LCD and integrated TV tuners demonstrates its commercial heritage. Dual platform pedals accommodate both SPD cleats and regular athletic shoes, while the adjustable personal fan shows attention to user comfort. With 20 resistance levels and Polar telemetry heart rate control, it offers precise training zones and automated intensity adjustments.
Value for Money: At $3,029, this is a luxury investment. Commercial-grade bikes with entertainment options typically start at this price and climb significantly higher. For boutique gyms or wealthy home users wanting the authentic club experience with integrated entertainment, it delivers. Casual home users will find better value in consumer-grade alternatives.
Strengths and Weaknesses: Strengths: Commercial durability, entertainment system ready, dual pedals, 20 resistance levels, heart rate control programs, adjustable fan, 350lb capacity Weaknesses: Extremely expensive for home use, entertainment system costs extra, heavy and not portable, overkill for casual exercisers
Bottom Line: The Star Trac S-UBx suits commercial facilities and affluent home users wanting the complete health club package. If integrated entertainment and commercial durability are non-negotiable, this delivers. For typical home fitness needs, more affordable options provide equal workout quality without the premium price tag.
6. Life Fitness Integrity Upright Bike

Overview:
The Life Fitness Integrity Upright Bike brings commercial-grade engineering directly into the home environment. Built with the same robust construction found in premium health clubs worldwide, this model specifically targets serious fitness enthusiasts who absolutely refuse to compromise on quality. The Integrity series represents decades of biomechanical research and extensive durability testing.
What Makes It Stand Out:
Life Fitness’s legendary reputation for gym-quality equipment shines through in the heavy-duty steel frame and precision-engineered components. The bike likely features an advanced console with intuitive navigation, though specific details aren’t listed. Its commercial pedigree ensures it can withstand daily intense workouts while maintaining whisper-quiet operation throughout its lifespan.
Value for Money:
At $1,695, this sits squarely in the premium home equipment tier. While expensive compared to consumer brands, it’s significantly cheaper than full commercial units costing $3,000+. For households where multiple users will log serious miles daily, the investment pays substantial dividends in longevity and performance consistency.
Strengths and Weaknesses:
Pros include exceptional durability, smooth magnetic resistance, ergonomic design, and strong resale value. Cons are the high upfront cost, substantial weight making it difficult to move, and potential overkill for casual exercisers. The lack of detailed feature specifications is frustrating for informed buyers.
Bottom Line:
Ideal for dedicated athletes, rehabilitation facilities, or households seeking true commercial quality. If you want a bike that will last a decade of heavy use, this justifies its premium price tag.
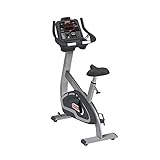
7. Sunny Health & Fitness Performance Upright Exercise Bike with 8-Level Magnetic Resistance, Pulse Sensor & Exclusive SunnyFit® App Enhanced Bluetooth Connectivity - SF-B220030

Overview:
The Sunny Health & Fitness SF-B220030 delivers surprising technological sophistication at a budget-friendly price point. This upright bike combines eight levels of magnetic resistance with modern app connectivity, making it accessible for beginners while offering growth potential for intermediate users. Its compact footprint suits apartment living without sacrificing stability.
What Makes It Stand Out:
The SunnyFit app integration transforms a basic bike into a connected fitness platform. With 1,000+ workout videos, real-time metric tracking, and global location maps, it provides motivation that competitors lack at this price. The frictionless magnetic resistance system ensures smooth, whisper-quiet operation perfect for shared living spaces.
Value for Money:
At $249.99, this represents exceptional value. Comparable bikes with app connectivity typically cost $400+. While it lacks the heavy-duty construction of premium brands, it delivers features that matter most to home users: quiet operation, adjustability, and digital engagement that keeps workouts fresh.
Strengths and Weaknesses:
Pros include the comprehensive app ecosystem, belt-drive quietness, four-way seat adjustability, and pulse sensors. Cons are limited to eight resistance levels (versus 20+ on premium models), lighter frame construction, and potential long-term durability questions under heavy daily use.
Bottom Line:
Perfect for budget-conscious buyers wanting modern features. It punches above its weight class, offering the connected fitness experience typically reserved for pricier equipment. Great starter bike that grows with your fitness journey.
8. Matrix Fitness U30 Upright Bike with XR | 8.5" LCD | Club-Quality, Stable Dual Form Frame, Comfort Arc Seat | Ideal for Long Rides and High Calorie Burn
Overview:
The Matrix U30 Upright Bike bridges the gap between commercial durability and home convenience. Engineered with club-quality components, it delivers a stable, comfortable ride for serious enthusiasts who log substantial miles but don’t need full commercial specifications. The 8.5-inch LCD provides essential metrics without overwhelming complexity.
What Makes It Stand Out:
The Dual Form Frame provides superior stability compared to single-post designs while maintaining a low step-through height for easy access. The Comfort Arc Seat is genuinely ergonomic, not just padded, reducing pressure points during long sessions. Twenty electronic resistance levels offer precise intensity control unmatched by mechanical systems.
Value for Money:
At $1,399, it undercuts premium commercial brands while delivering 90% of the experience. The optimized pedal spacing reduces joint stress, making it ideal for users with knee concerns. You’re paying for thoughtful engineering rather than just brand prestige, striking a smart balance.
Strengths and Weaknesses:
Pros include exceptional stability, superior seat comfort, wide resistance range, and quiet operation. Cons include the lack of mentioned app connectivity (a surprising omission at this price) and it’s still a significant investment for casual users. The LCD, while clear, lacks the touchscreen sophistication of newer models.
Bottom Line:
An excellent compromise for dedicated riders wanting commercial feel without the full commercial price. The ergonomic design makes it particularly suitable for long-duration cardio sessions and users prioritizing joint health.
9. Precor UBK 835 Commercial Series Upright Exercise Bike

Overview:
The Precor UBK 835 represents the pinnacle of commercial upright bikes adapted for home use. Every detail reflects decades of biomechanical research, from the three-position handlebars to the uniquely contoured seat. This is equipment designed for users who demand uncompromising quality and precise workout metrics.
What Makes It Stand Out:
The handlebar design offers upright, cruising, and road racing positions, engaging different muscle groups and preventing workout monotony. Smart Rate heart rate monitoring provides instant feedback on fat burn, cardio, and peak zones when you input age and weight. The universal seat post accepts aftermarket saddles, a rare feature that allows true customization.
Value for Money:
At $2,395, it’s the most expensive option here, but the warranty justifies the cost: lifetime frame, 10 years parts, one year labor. Dual-sided pedals accommodate both casual users and serious cyclists using clip-in shoes. This is a lifetime investment, not a simple purchase.
Strengths and Weaknesses:
Pros include exceptional ergonomics, comprehensive heart rate monitoring, commercial-grade warranty, and customization options. Cons are the premium price tag and substantial footprint. For casual users, the advanced features may go underutilized, making it potentially excessive.
Bottom Line:
The ultimate choice for serious athletes, luxury home gyms, or rehabilitation settings. If budget isn’t a constraint and you want the industry’s best ergonomics and durability, the UBK 835 is unmatched.
10. Marcy Upright Exercise Bike with Resistance ME-708
Overview:
The Marcy ME-708 strips away complexity to deliver reliable, no-frills cardio at an entry-level price. Built with 14-gauge steel tubing and powder-coated finish, it provides basic functionality for beginners testing the waters of indoor cycling without financial commitment. Its straightforward design prioritizes function over flash.
What Makes It Stand Out:
The ultra-functional console displays time, speed, distance, and calories in oversized numbers, prioritizing readability over flashy graphics. Counterbalanced pedals with adjustable straps offer surprising stability for this price class. The eight-level magnetic resistance system, while basic, provides adequate challenge for novice to intermediate users.
Value for Money:
At $139.33, this is the clear budget champion. It’s less than two months of gym membership and provides comparable basic cardio benefits. While it won’t satisfy serious cyclists, it delivers exactly what casual users need: a stable platform for consistent low-impact exercise without breaking the bank.
Strengths and Weaknesses:
Pros include unbeatable price, simple assembly, lightweight design for easy moving, and straightforward operation. Cons are the basic LCD display, limited resistance range, narrower seat adjustability, and lighter construction that may wobble during intense sprints or heavier users.
Bottom Line:
Perfect for seniors, absolute beginners, or anyone prioritizing affordability over advanced features. It reliably covers the basics without pretense. If you’re unsure about committing to indoor cycling, this is the lowest-risk entry point available.
Understanding Zone-2 Training and Why It Demands Precision
The Science Behind Zone-2 Cardio
Zone-2 represents your aerobic base—the intensity where lactate production and clearance exist in perfect equilibrium. At this effort level, you’re primarily burning fat for fuel, sparing glycogen, and stimulating mitochondrial biogenesis without accumulating metabolic stress. The problem? Your body is remarkably efficient at fooling you. Perceived exertion can vary daily based on sleep, caffeine, stress, and hydration, making subjective pacing unreliable. Power meters help, but heart rate remains the gold standard for monitoring metabolic cost in real-time. An upright bike that can’t maintain accurate, consistent heart-rate feedback will have you training in zone-1 (too easy) or zone-3 (too hard) without realizing it, sabotaging months of consistent work.
Why Heart Rate Beats Pace or Perceived Exertion
Unlike running, where pace is a decent proxy for effort on flat terrain, cycling introduces variables like resistance, cadence, and mechanical efficiency that make “feel” notoriously deceptive. You might think you’re cruising at zone-2, but a glance at your heart rate reveals you’re actually flirting with zone-4 after that third espresso. For zone-2 training, you need continuous feedback that captures cardiac drift, dehydration effects, and accumulating fatigue. This requires a telemetry system that updates every second without lag, averages data intelligently to avoid panic spikes, and displays your zone position clearly without forcing you to do mental math mid-workout.
Heart-Rate Telemetry: Your Zone-2 Compass
Chest Straps vs. Wrist Sensors vs. Handlebar Grips
Not all heart-rate monitoring is created equal. Optical wrist sensors, while convenient, suffer from accuracy drops during cycling due to wrist flexion, vibration, and compromised blood flow. Handlebar grip sensors are even worse—constantly shifting hand positions, sweat interference, and delayed readings make them nearly useless for zone-2 precision. For serious training, chest strap monitors using electrocardiography (ECG) remain the undisputed champion. They detect electrical signals directly from your heart, delivering millisecond-accurate R-R intervals and immunity to motion artifact. When evaluating an upright bike, prioritize models with dedicated chest strap compatibility over built-in optical sensors.
ANT+ vs. Bluetooth Connectivity Protocols
Your chest strap is only as good as its connection to the bike’s console. ANT+ protocol was purpose-built for fitness devices, offering robust, low-power transmission with minimal interference from other wireless signals in your home gym. It allows multiple devices to receive the same signal simultaneously—think bike console, watch, and tablet all reading from one strap. Bluetooth is more universal but can suffer from pairing conflicts and slightly higher latency. The best upright bikes feature dual-band receivers that speak both languages fluently, ensuring your heart rate data flows uninterrupted regardless of your ecosystem. Look for consoles that explicitly list ANT+ FE-C (Fitness Equipment Control) compatibility for future-proofing.
Accuracy Matters: Signal Dropout and Latency Issues
Nothing derails a zone-2 session like your heart rate display suddenly dropping to 85 bpm mid-climb or spiking to 190 during a easy warm-up. Signal dropout—typically caused by weak receivers, poor strap contact, or wireless interference—forces you to either ignore bad data (dangerous) or stop to troubleshoot (disruptive). Latency, the delay between your actual heartbeat and the displayed number, can cause you to overshoot your target before the console catches up. Premium bikes use advanced signal smoothing algorithms that differentiate between genuine cardiac shifts and artifacts, displaying a 3-5 second rolling average that’s responsive yet stable. Test this by watching how quickly the display responds to a deliberate 30-second sprint—if it lags by more than 5 seconds, look elsewhere.
Upright Bike Anatomy for Serious Zone-2 Work
Flywheel Weight and Smoothness
Zone-2 sessions are marathons, not sprints, and a choppy pedal stroke will have you fighting the bike instead of finding your rhythm. Flywheel weight determines inertia—the heavier the flywheel, the more kinetic energy it stores, smoothing out the dead spots in your pedal stroke. For zone-2 training, aim for at least 20 pounds (9 kg) of flywheel mass. Perimeter-weighted designs concentrate mass at the edge, amplifying the smoothing effect without adding total weight. Some magnetic resistance bikes use electronic flywheels that simulate weight through algorithms, which can work well if the programming is sophisticated, but often feel artificial during long, steady efforts.
Resistance Systems: Magnetic vs. Friction
Friction resistance, using felt pads on the flywheel, is a non-starter for zone-2 training. The pads wear unevenly, creating unpredictable resistance changes and requiring constant adjustment as they heat up. Magnetic resistance, particularly electromagnetic systems, offers infinite adjustability with zero contact and no wear. For zone-2 work, you need micro-adjustments of 1-2% intensity to stay locked in your zone as you fatigue. Look for bikes with step-less electromagnetic resistance controlled by servo motors—these can auto-adjust based on your heart rate, a game-changing feature we’ll explore later. Avoid bikes with coarse resistance steps; hunting for the right intensity will drive you mad.
Q-Factor and Pedal Ergonomics
The Q-factor—the horizontal distance between pedal attachment points—dramatically affects knee tracking and comfort during long sessions. Road bikes typically sit around 150mm, while many indoor bikes exceed 200mm, forcing your legs into an unnatural wide stance that strains hips and knees. For zone-2 training where you’ll accumulate 5-10 hours weekly, a Q-factor under 180mm is essential. Premium bikes offer adjustable Q-factors or naturally narrow designs. Pedal choice matters too: dual-sided pedals with both SPD clips for cycling shoes and toe cages for sneakers provide flexibility. Ensure the pedal thread is standard 9/16” so you can upgrade to your preferred road pedals if needed.
Essential Features for Zone-2 Training
Real-Time Heart Rate Display and Zone Alerts
Your console should treat heart rate zones as first-class citizens, not just another data field. The best displays use color-coded zones that fill the screen, making it instantly obvious where you are. Even better: customizable zone alerts that flash or beep when you drift above or below your zone-2 window. For zone-2 training, you want subtle, non-jarring alerts—a gentle flash is better than a blaring alarm that spikes your stress hormones. Some bikes let you lock the resistance automatically when you hit zone-2, a feature that’s worth its weight in gold for maintaining steady-state effort.
Programmable Workouts and Zone Locking
Manual mode is fine for short sessions, but true zone-2 mastery requires structured blocks of 45, 60, even 120 minutes. Look for bikes that allow you to program custom workouts with specific heart rate targets, not just time or distance goals. The holy grail is “zone locking” or “heart rate cruise control”—the bike automatically adjusts resistance to keep you at 135 bpm (or whatever your zone-2 is) regardless of cadence changes or cardiac drift. This transforms your workout from constant micro-management to pure focus on breathing and form. Not all bikes advertise this feature clearly; search for terms like “watt control by heart rate” or “target HR mode.”
Data Logging and Export Capabilities
Zone-2 training rewards patience and consistency, which means tracking trends over weeks and months. Your bike should store workout history locally and sync to cloud platforms via WiFi or Bluetooth. More importantly, it must export data in standard formats (FIT, TCX, CSV) that play nice with TrainingPeaks, WKO5, or your preferred analysis software. This allows you to overlay heart rate data with sleep, nutrition, and HRV to identify patterns. Bikes that lock you into proprietary apps are a red flag—you’re investing in a data ecosystem, not just a piece of hardware.
Technology Integration and Ecosystem Compatibility
App Syncing and Third-Party Platform Support
The modern training landscape is app-driven. Your upright bike should seamlessly integrate with platforms like Zwift for virtual riding, TrainerRoad for structured plans, and Apple Health or Google Fit for holistic wellness tracking. Check if the bike broadcasts heart rate data as a standard Bluetooth/ANT+ signal that any app can receive, or if it requires a specific bridge connection. Some consoles run Android or iOS, letting you install apps directly—convenient, but ensure the bike still functions offline. For zone-2 work, consider apps that provide audio coaching based on your live heart rate, keeping your eyes off the screen and on your breathing.
Screen Metrics That Actually Matter for Zone-2
Manufacturers love cramming screens with useless animations and games, but for zone-2 training, clutter is the enemy. Your display should prioritize: current heart rate (large, central), time in zone (cumulative), and average heart rate for the session. Secondary metrics: cadence, power (if available), and resistance level. Everything else—calories, distance, fan speed—is noise. The best interfaces let you customize which metrics appear and how large they’re displayed. Touchscreens are trendy but can be finicky with sweaty fingers; tactile buttons often work better during intense focus. Consider screen glare if you’ll train in bright rooms.
Build Quality and Durability Considerations
Frame Construction and Weight Capacity
A wobbly bike destroys concentration and can be dangerous during long sessions. Look for frames built from high-tensile steel or aluminum alloy with welded joints, not bolted connections that loosen over time. The base should be wide with adjustable leveling feet to accommodate uneven floors. Weight capacity is a proxy for build quality—bikes rated for 350+ pounds typically use thicker tubing and better bearings. For zone-2 training, you’ll be putting in serious hours; a cheap frame will develop creaks and flex that drive you insane. Give the bike a good shake in the showroom; any wobble is a dealbreaker.
Seat and Handlebar Adjustability
You’ll be parked on this bike for hours, so fit is non-negotiable. The seat should adjust vertically and horizontally (fore/aft) with indexed markings so you can return to your exact position after maintenance. Handlebars need vertical adjustment and, ideally, fore/aft movement to replicate your road bike geometry. Micro-adjustment knobs beat pull-pins, which slip under load. Seat comfort is subjective, but look for standard rail mounts so you can swap in your favorite saddle. For zone-2 training, a slightly more upright position than a road bike is fine—comfort trumps aerodynamics when you’re holding 140 bpm for 90 minutes.
Noise Levels and Home-Friendly Design
That whisper-quiet magnetic resistance can still generate noise through chain drives, poorly aligned belts, or resonating frames. Belt drives are quieter and require less maintenance than chains, but ensure the belt is toothed (cogged) not smooth, to prevent slip. Test the bike at high cadence (100+ rpm) and high resistance—some bikes develop a hum or rattle only under load. For apartment dwellers, consider bikes with acoustic dampening in the frame and a flywheel guard that doubles as a sound barrier. Zone-2 sessions are meditative; the last thing you want is a grinding noise reminding you that your cheap bearings are dying.
Calibration and Accuracy: Trusting Your Numbers
Power Meter Integration vs. Heart Rate
The most advanced upright bikes include power meters, measuring wattage directly rather than estimating it from resistance and cadence. While not strictly necessary for zone-2 training, power data helps you understand the relationship between your output and cardiac cost (your “aerobic efficiency”). Over time, you should see the same heart rate producing more watts—a clear sign of improved fitness. If the bike has power, ensure it’s a true strain gauge system, not a calculated estimate. The gold standard is dual-sided power measurement, but single-sided is acceptable for zone-2 consistency.
How to Test Your Bike’s Heart Rate Accuracy
Before committing to a bike, perform a simple validation test. Wear a trusted chest strap (like a Polar H10) connected to your sports watch, then pair the same strap to the bike’s console. Ride a steady zone-2 effort for 10 minutes and compare the average heart rates. They should be within 1-2 bpm. Next, do a 30-second sprint and watch recovery: both devices should show similar drop patterns. Finally, test at low heart rates (90-100 bpm) where optical sensors often fail—this is crucial for recovery rides. Document any discrepancies; even 5 bpm errors can shift you out of zone-2.
When to Recalibrate Your System
Heart rate telemetry isn’t “set and forget.” Chest straps need periodic battery changes and electrode gel replacement. The bike’s receiver can drift, especially after firmware updates. Recalibrate monthly using the test above, and always recalibrate after moving the bike (wireless interference patterns change) or changing your training environment temperature. Some electromagnetic resistance systems self-calibrate by measuring current draw, but this doesn’t replace heart rate validation. Mark your calendar: first Sunday of every month, spend 15 minutes verifying accuracy. Your long-term progress depends on this discipline.
Advanced Features Worth the Investment
Auto-Resistance Adjustment Based on Heart Rate
This is the feature that separates toys from tools. Bikes with closed-loop control systems can take your target heart rate and continuously modulate resistance to keep you there, compensating for cardiac drift, fatigue, and cadence changes. As your heart rate naturally climbs after 45 minutes, the bike subtly backs off resistance, keeping you in zone-2 without conscious effort. This isn’t just convenient—it’s transformative. It allows you to focus entirely on breathing, posture, and mental state rather than constantly fiddling with knobs. The technology requires sophisticated algorithms and high-quality servo motors; expect this only in mid-range to premium bikes.
Multi-User Profiles and Adaptive Training
If multiple people use the bike, individual profiles that store personal heart rate zones, fit settings, and workout history are essential. Better yet, some systems use AI to adapt your zones based on performance trends. If you consistently complete 60-minute sessions with lower heart rates, the bike might suggest raising your zone-2 ceiling. Conversely, if your heart rate is elevated due to accumulated fatigue, it might recommend a recovery day. This adaptive intelligence prevents the common mistake of training with outdated zones based on a max heart rate test from six months ago.
Recovery Metrics and HRV Monitoring
The most forward-thinking bikes integrate heart rate variability (HRV) measurement, either through the chest strap or handlebar sensors. By analyzing the variation between heartbeats, these systems can assess your autonomic nervous system state, telling you whether you’re recovered enough for a zone-2 session or need active recovery. While not essential, HRV integration helps you avoid the zone-2 trap: doing too much moderate work and never truly recovering. Look for bikes that display a “readiness score” based on morning HRV measurements, guiding your daily training decisions.
Budget Tiers and What to Expect
Entry-Level Options: Sacrifices and Smart Compromises
Sub-$500 bikes will have heart rate capability, but typically through unreliable grip sensors or basic Bluetooth that drops signals. Flywheels under 15 pounds create choppy rides, and resistance is often step-based rather than continuous. However, you can still get quality zone-2 work done if you bring your own chest strap and pair it to your phone app, ignoring the bike’s console entirely. The smart compromise here is prioritizing mechanical quality: a heavy flywheel and stable frame, even if the electronics are basic. You can always upgrade the telemetry later with a third-party bike computer.
Mid-Range Sweet Spot for Serious Enthusiasts
The $800-$1,500 range is where zone-2 training features become serious. Expect dual ANT+/Bluetooth receivers, electromagnetic resistance with micro-adjustments, flywheels over 20 pounds, and consoles that prioritize heart rate zones. Many bikes in this tier offer auto-resistance control and solid app integration. Build quality jumps significantly, with better bearings and quieter operation. This is the sweet spot for most athletes: you get 90% of premium functionality without the luxury markup. Focus on bikes that explicitly mention “heart rate control” or “zone training” in their specifications.
Premium Features That Transform Your Training
Above $2,000, you’re paying for refinement and integration. Bikes feature carbon fiber belt drives, dual-sided power meters, automatic calibration, and stunning displays with deep app ecosystems. The auto-resistance algorithms become predictive, learning your cardiac response patterns to adjust before you drift out of zone. Frame warranties extend to 10+ years, and Q-factors approach road bike geometry. For the dedicated zone-2 practitioner logging 8+ hours weekly, this investment pays dividends in consistency, data quality, and sheer training pleasure. The question isn’t if you need these features, but if your commitment justifies the cost.
Setup and Optimization for Maximum Results
Proper Bike Fit for Long Zone-2 Sessions
Zone-2 training demands comfort above all. Start with the seat at hip height when standing next to the bike. Sit and pedal; your leg should have a slight 25-30 degree bend at full extension. The fore/aft position should place your knee directly over the pedal spindle when cranks are horizontal. Handlebars should be level with or slightly above the seat to open your hip angle—aggressive aero positions restrict breathing and shift load to your anaerobic system. Use a mirror or phone video to check your posture: flat back, relaxed shoulders, no knee wobble. A proper fit prevents the nagging aches that make you skip sessions.
Environmental Factors: Temperature and Hydration
Heart rate at zone-2 intensity rises roughly 1-2 bpm for every degree above 68°F (20°C). A fan isn’t a luxury; it’s essential equipment for maintaining accurate zones. Position a powerful fan 45 degrees to your side, not directly in your face, to promote evaporative cooling without drying your eyes. Hydration status also skews heart rate: 2% dehydration can elevate it by 5-8 bpm. Weigh yourself before and after sessions; losing more than 1% body weight means you’re under-hydrated and your zone-2 data is compromised. Keep water within easy reach and sip every 10 minutes.
Creating a Distraction-Free Training Space
Zone-2 training is meditative work that rewards mental focus. Position your bike away from household traffic and digital distractions. The screen should display only essential metrics; cover flashy animations with tape if necessary. Use noise-canceling headphones with ambient music or podcasts that don’t spike your adrenaline. Lighting matters: bright, cool light keeps you alert, while dim warm light may cause you to drift intensity. Some athletes face a blank wall to internalize focus; others prefer a window with a view. Experiment, but treat your training space as a laboratory where variables are controlled.
Common Mistakes and How to Avoid Them
Chasing False Heart Rate Spikes
That sudden jump to 180 bpm mid-workout is almost never real cardiac stress—it’s signal interference, a dry electrode, or muscle artifact. The worst response is to panic and slam resistance down, disrupting your session. Instead, watch the number for 15 seconds. If it’s a spike, it’ll usually disappear as quickly as it appeared. If it persists, check your strap connection and re-wet the electrodes. Train yourself to recognize your true zone-2 “feel” so you can ignore obvious artifacts. Some consoles let you set a “spike filter” that ignores changes over 20 bpm in under 5 seconds.
Ignoring Recovery Heart Rate Trends
Zone-2 training isn’t just about time in zone; it’s about cardiac efficiency. Track how quickly your heart rate drops in the first 60 seconds after a session. A slowing recovery rate over weeks suggests overtraining or inadequate rest. Conversely, faster recovery indicates improving fitness. Many cyclists obsess over workout data but never analyze the cooldown. Set a recurring reminder to log your 1-minute and 2-minute post-workout heart rates. This simple metric often predicts plateaus before they happen, allowing you to adjust volume and intensity proactively.
Overlooking Firmware Updates
Manufacturers regularly release firmware updates that improve heart rate algorithm accuracy, fix connectivity bugs, and add features. A bike running two-year-old firmware might have known telemetry issues that were resolved in an update. Check for updates monthly through the bike’s app or website. Some premium models update automatically over WiFi, but most require manual initiation. After updating, always recalibrate and test accuracy. I’ve seen athletes struggle with mysterious heart rate dropouts for months, only to discover a firmware fix was available all along. Treat your bike’s software with the same attention as its hardware.
Beyond the Bike: Completing Your Zone-2 Toolkit
Complementary Metrics to Track
Heart rate tells the metabolic story, but power reveals mechanical efficiency. If your bike lacks a power meter, consider adding pedals with built-in power (like Favero Assioma) that transmit via ANT+. Track cadence separately with a cheap crank sensor; optimal zone-2 cadence is typically 85-95 rpm, lower than high-intensity work. Combine these with morning HRV and resting heart rate to build a complete readiness picture. The magic happens when you correlate heart rate with power: if 150 watts used to put you at 140 bpm and now it takes 160 bpm, you’re either fatigued or losing fitness, regardless of how workouts “feel.”
When to Combine with Outdoor Training
Upright bikes excel at controlled zone-2 work, but outdoor riding builds real-world durability and handling skills. Use the bike for 70-80% of your base training, where precision matters most. Take your zone-2 fitness outside once weekly to adapt to variable terrain, wind, and bike handling. Your outdoor heart rate will be 5-10 bpm higher for the same perceived effort due to thermoregulation challenges and muscle recruitment differences. Don’t chase the same numbers outside; instead, use the bike to build capacity, then apply it in the real world. The bike becomes your laboratory; the road becomes your testing ground.
Frequently Asked Questions
How do I accurately determine my personal zone-2 heart rate range?
Perform a field test after 2-3 days of rest. Warm up for 15 minutes, then ride at the fastest pace you can sustain while breathing only through your nose or maintaining a conversation without gasping. This is roughly your zone-2 ceiling. Alternatively, calculate 60-70% of your true max heart rate (from a recent test, not the old 220-age formula) or use the MAF method (180 minus your age, with adjustments). Validate by checking if you can complete 60 minutes at this intensity while staying conversational and recovering quickly.
Can I use a smartwatch instead of a chest strap with my upright bike?
Technically yes, but not recommended for zone-2 precision. Optical wrist sensors can lag by 10-30 seconds and suffer accuracy drops of 15% or more during cycling due to wrist position and vibration. For casual workouts, a watch is fine, but for dedicated zone-2 training where you’re making decisions based on 5-bpm differences, a chest strap is non-negotiable. If you must use a watch, enable its broadcast mode and ensure the bike’s console can receive it, but verify accuracy against a chest strap monthly.
Why does my heart rate drift upward during long zone-2 sessions even when resistance stays constant?
This is “cardiac drift”—a normal response to dehydration, increased core temperature, and circulating catecholamines. Your stroke volume decreases slightly, so heart rate increases to maintain cardiac output. Expect 5-10 bpm drift over 60 minutes. To minimize: stay hydrated, use a powerful fan, and accept that you may need to reduce resistance slightly mid-session to stay in zone. Don’t panic; this doesn’t mean you’re getting less fit. Track drift trends over time—reducing drift indicates improved thermoregulation and cardiovascular efficiency.
How often should I replace the battery in my heart rate chest strap?
Most chest strap batteries (CR2032 coin cells) last 400-600 hours of active training. For someone doing 5 hours of zone-2 weekly, that’s about 18-24 months. However, battery voltage drops non-linearly—performance can degrade in the final 10% without obvious warning. Replace annually as preventative maintenance, or immediately if you notice increased dropout rates or erratic readings. Keep spare batteries in your gym bag. Some premium straps now use rechargeable batteries; charge them weekly as part of your routine.
Is electromagnetic resistance really worth the extra cost over manual magnetic resistance?
For zone-2 training, absolutely. Manual magnetic resistance uses a mechanical knob and permanent magnets, offering 20-30 discrete levels. Finding and maintaining exact zone-2 intensity is like trying to set a precise temperature with a faucet that only has “hot” and “cold” settings. Electromagnetic resistance provides infinite, step-less control and enables auto-adjustment features. The precision pays for itself in training quality and reduced frustration. You’ll hit your target faster and stay there longer, making every minute count.
My bike’s console shows different heart rate zones than my training app. Which should I trust?
Always trust zones based on your personal physiology, not default formulas. Most bikes use simplistic 220-age calculations that are notoriously inaccurate. Calculate your own zones using a max heart rate test or lactate threshold test, then manually input these numbers into both the bike’s console and your app. If the bike won’t allow custom zone entry, use your app as the master and ignore the bike’s zone display, focusing only on the raw heart rate number. Consistency across platforms is key for tracking trends.
Can zone-2 training be effective on a bike without power measurement?
Absolutely. Heart rate is the primary metric for zone-2 because it directly reflects metabolic stress. Power is a useful secondary metric but not required. Many elite athletes train by heart rate alone, especially for base building. Focus on maintaining steady heart rate, consistent cadence, and good form. If you later want power data, you can add power meter pedals without replacing the entire bike. Don’t let lack of power be a barrier to starting zone-2 work today.
How do I prevent saddle sores during long zone-2 sessions?
Saddle sores end more zone-2 programs than any equipment failure. Start with a proper bike fit to eliminate pressure points. Use a saddle designed for endurance, not racing—wider with more padding than you’d use outdoors. Wear high-quality bib shorts with seamless chamois, even if training alone. Apply chamois cream liberally to both skin and shorts. Stand for 30 seconds every 10 minutes to restore blood flow. Keep the area clean and dry; shower immediately after sessions. If sores develop, take 3-5 days off and use a different saddle upon return.
Should I do zone-2 training fasted to enhance fat adaptation?
Fasted zone-2 sessions can increase fat oxidation rates, but they’re not mandatory and may compromise workout quality if you’re under-fueled. For sessions under 90 minutes, training fasted is generally safe and may offer metabolic benefits. For longer sessions, consume 30-60g of carbs per hour to maintain intensity and prevent excessive muscle breakdown. The key is consistency in your approach—if you train fasted, do so regularly to adapt. Never do back-to-back fasted sessions without adequate recovery nutrition. Monitor your heart rate: if it’s 10+ bpm higher than usual for the same power, you’re under-fueled.
What maintenance does an upright bike with heart-rate telemetry require?
Weekly: Wipe down the frame and console, clean sweat from contact points, and check that all bolts remain tight. Monthly: Inspect the belt/chain for wear, calibrate heart rate accuracy, and lubricate the seat post and handlebar stems. Quarterly: Deep clean the flywheel housing (dust accumulation affects magnetic resistance), check pedal threads, and update firmware. Annually: Replace the chest strap battery, inspect bearings for play, and consider professional servicing for electromagnetic systems. Keep a maintenance log; preventive care prevents the mid-session breakdowns that derail training blocks. Treat it like any precision instrument—neglect is the enemy of accuracy.