The deadlift is the king of strength exercises—there’s no debate. It builds raw power, forges mental toughness, and translates to real-world performance like nothing else. But here’s the brutal truth: most lifters are leaving gains on the table and inviting injury with every single rep. Even experienced athletes struggle to maintain a neutral spine under maximal loads, and the mirror only tells part of the story. Your training partner’s eye? Helpful, but inconsistent. Video review? Great, but it’s post-mortem analysis, not real-time correction.
Enter wearable posture sensors—the silent training partners that don’t miss a millimeter of spinal flexion or a degree of hip hinge deviation. These aren’t gimmicky fitness trackers counting steps; they’re sophisticated biomechanical tools that provide instantaneous feedback on the most critical aspects of your deadlift mechanics. For serious lifters, coaches, and rehabilitation professionals, this technology represents a paradigm shift from reactive coaching to proactive movement patterning. But with a rapidly evolving market and technical specifications that read like aerospace engineering manuals, how do you separate signal from noise? Let’s dive deep into what makes these devices game-changers for your deadlift, and more importantly, how to choose the right system for your specific needs.
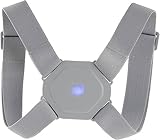
Top 10 Wearable Posture Sensors for Deadlift Form
Detailed Product Reviews
1. RESET Smart Posture Corrector – Bone Conduction Sensor to Prevent Turtle Neck | Wearable Health Tracker for Neck and Spine Alignment

Overview: The RESET Smart Posture Corrector positions itself as a premium solution for combating “turtle neck” syndrome through innovative bone conduction sensor technology. This wearable health tracker continuously monitors neck and spine alignment, delivering gentle corrective feedback throughout your daily routine. Designed for professionals and health-conscious individuals, it promises to reduce neck pain while building lasting postural awareness.
What Makes It Stand Out: The bone conduction sensor technology distinguishes this device from standard vibration-based correctors, potentially offering more nuanced feedback. Its dedicated smartphone app provides comprehensive analytics, tracking your posture habits over time with detailed insights rather than simple alerts. The ergonomic, lightweight design ensures all-day comfort while remaining discreet under clothing, making it practical for office environments.
Value for Money: At $25, the RESET occupies the mid-range tier, justifying its price through advanced sensor capabilities and app integration. While basic mechanical braces cost $15-20, they lack real-time monitoring. Compared to premium competitors at $40+, this offers sophisticated tracking without the premium price tag, representing solid value for tech-savvy users seeking data-driven improvement.
Strengths and Weaknesses: Strengths include cutting-edge sensor accuracy, insightful app analytics, comfortable extended wear, and multi-day battery life. The discreet profile works well in professional settings. Weaknesses involve potential over-reliance on technology—users seeking simplicity may find the app unnecessary. The bone conduction feedback might require adjustment period, and setup could intimidate less tech-comfortable individuals.
Bottom Line: Ideal for data-driven users committed to long-term postural health, the RESET Smart Posture Corrector delivers meaningful technological advantages over basic models. If you value detailed progress tracking and innovative feedback mechanisms, this $25 investment will serve you well.
2. Generic Smart Posture Corrector for Women Men Kids, Electronic Posture Reminder with Sensor Vibration, Adjustable Upper Back Brace Straightener for Hunching - 200mAh Battery

Overview: This Generic Smart Posture Corrector offers an accessible entry point into electronic posture training for women, men, and children. Using sensor-based vibration alerts, it aims to retrain muscle memory over a structured 21-day habit formation period. The adjustable nylon design promises comfortable, invisible wear across diverse body types and ages.
What Makes It Stand Out: The device provides clear behavioral guidance with its 21-day habit formation and 90-day stabilization timeline, giving users a concrete roadmap. Its impressive 15-day battery life after just two hours of charging outperforms many competitors. The high-elastic nylon fabric ensures pressure-free comfort, while the 25-degree forward bend trigger threshold offers precise, timely corrections.
Value for Money: At $11.47, this corrector delivers exceptional affordability without sacrificing core functionality. Manual posture braces typically cost $10-15 but lack intelligent feedback. Compared to app-enabled devices at $25+, this offers essential electronic monitoring at less than half the price, making it an outstanding value for families or first-time users.
Strengths and Weaknesses: Strengths include universal adjustability, long battery endurance, comfortable breathable material, and evidence-based usage guidelines. The invisible under-clothing design enhances versatility. Weaknesses stem from its generic branding—long-term durability and customer support remain uncertain. The lack of smartphone integration means no progress tracking data, and vibration intensity may prove insufficient for some users.
Bottom Line: This $11.47 posture corrector excels as a budget-friendly, no-frills solution for building postural awareness. Perfect for cost-conscious buyers wanting effective vibration-based training without app complexity, though durability questions warrant moderate expectations.
3. Fox Valley Traders Smart Sensor Vibrating Posture Corrector

Overview: The Fox Valley Traders Smart Sensor Posture Corrector takes a minimalist approach to posture training, offering straightforward vibration-based alerts without app complexity. Marketed as a unisex solution with one-size-fits-most versatility, it targets users seeking simple, immediate feedback for back alignment issues.
What Makes It Stand Out: Its simplicity is its defining characteristic—no smartphone pairing, no data analytics, just direct tactile feedback when you slouch. The USB rechargeable battery eliminates ongoing costs, while the elastic strap design prioritizes ease of use. At $22.58, it bridges the gap between basic mechanical braces and high-tech app-enabled devices.
Value for Money: This corrector sits in an awkward price position. While cheaper than premium app-integrated models, it costs nearly double the feature-rich generic alternative yet offers significantly less functionality. The value proposition hinges entirely on brand trust and simplicity preference, making it hard to justify over comparably priced but more advanced competitors.
Strengths and Weaknesses: Strengths include user-friendly operation, comfortable elastic material, and discreet unisex styling. The USB charging adds convenience. However, the “one size fits most” approach risks poor fit for outliers, and the sparse feature description raises concerns about battery life and sensor accuracy. Without app support or detailed specifications, users fly blind regarding progress tracking.
Bottom Line: Best suited for technophobes wanting set-it-and-forget-it simplicity, but most buyers will find better value elsewhere. The Fox Valley model works adequately yet lacks compelling advantages over cheaper, more feature-complete alternatives in the crowded posture corrector market.
4. Posture Corrector for Women Men s Electronic Posture Reminder with Sensor Vibration Adjustable Upper Back Brace Straightener for Hunching
Overview: This ultra-budget Electronic Posture Reminder delivers core smart correction features at an unbeatable $8.27 price point. Designed for universal fit across adults and children, it employs vibration alerts triggered by 25-degree forward bending. The device mirrors the generic model’s specifications—including 15-day battery life and habit formation guidance—while undercutting most competitors significantly.
What Makes It Stand Out: The price is the headline feature, making electronic posture correction accessible to virtually any budget. It retains surprisingly complete functionality: high-elastic nylon construction, invisible under-clothing wear, and clear usage protocols (2 hours daily, 21-day formation period). The rechargeable lithium battery offers the same endurance as pricier alternatives.
Value for Money: At $8.27, this represents the best dollar-for-dollar value in the category. Comparable manual braces cost more, while lacking intelligent feedback. Even other budget electronic models charge 30-40% more for identical features. The cost is low enough to treat as a trial investment, removing financial barriers for students or anyone hesitant about posture tech.
Strengths and Weaknesses: Strengths are obvious: extreme affordability, comfortable materials, multi-day battery, and inclusive sizing. The invisible design works everywhere. Weaknesses reflect the price point—generic build quality invites durability doubts, customer support is likely minimal, and vibration strength consistency may vary. The lack of brand reputation requires tempered expectations.
Bottom Line: An outstanding entry-level choice for first-time users prioritizing cost over brand assurance. While long-term reliability remains questionable, the $8.27 investment poses minimal risk. Purchase if you want functional electronic correction on the tightest budget, but consider upgrading if you require robust build quality.
Why Deadlift Form Breakdown Is Your Biggest Training Liability
Every time you step up to the barbell, you’re performing a complex movement that demands precise coordination between your nervous system and musculoskeletal structure. The margin for error is razor-thin. A spine that drifts into flexion under 400 pounds doesn’t just compromise the lift—it compromises your discs, facet joints, and long-term training longevity. Research consistently shows that lumbar flexion under load increases shear forces exponentially, turning your intervertebral discs into ticking time bombs.
The Biomechanics of a Perfect Deadlift
A mechanically sound deadlift maintains spinal neutrality from setup to lockout while the hips and knees extend in a coordinated sequence. The barbell should travel in a vertical path over the mid-foot, with scapulae positioned directly over the bar at the start. Your wearable sensor should track three critical zones: thoracic extension capacity, lumbar stability, and hip hinge mechanics. The technology must differentiate between acceptable thoracic rounding (common in advanced lifters using thoracic flexion) and dangerous lumbar flexion. This distinction is crucial—generic posture monitors designed for desk workers will scream at powerlifters using proper technique.
Common Form Failures That Lead to Injury
The most insidious breakdowns happen when fatigue masks itself as compensation. Your hips rise too early, turning the lift into a stiff-legged pull. Your knees collapse inward, destroying your base of power. Your shoulders drift forward, placing the bar in front of your center of mass. Each of these failures has a signature movement pattern that quality sensors detect through angular velocity changes and positional drift. The best systems don’t just alert you after the fact; they predict failure by analyzing the rate of hip ascent versus barbell velocity, giving you actionable intelligence mid-set.
How Wearable Posture Sensors Actually Work
Understanding the underlying technology prevents you from falling for marketing fluff. These devices aren’t magic—they’re precision instruments that convert physical movement into digital data streams you can act upon.
The Technology Inside: IMUs, Accelerometers, and Gyroscopes
At the heart of every serious posture sensor lies a 9-axis Inertial Measurement Unit (IMU), combining a 3-axis accelerometer, 3-axis gyroscope, and 3-axis magnetometer. The accelerometer tracks linear movement and gravitational forces, detecting when your torso angle changes relative to vertical. The gyroscope measures rotational velocity, crucial for identifying that subtle hip shift or spinal twist at the sticking point. The magnetometer provides orientation reference, compensating for gyroscopic drift during long training sessions. For deadlift applications, look for sensors with ±16g acceleration range (to handle barbell impact) and at least 2000 degrees/second gyroscopic range.
Real-Time Feedback Mechanisms Explained
Data collection means nothing without immediate, actionable feedback. High-quality systems process sensor fusion algorithms locally on the device, reducing latency to under 50 milliseconds. This speed matters because your nervous system needs feedback within the motor learning window to adjust subsequent reps. The device compares your live movement against pre-calibrated “movement envelopes”—essentially a 3D tunnel of acceptable mechanics. Stray outside this tunnel, and the system triggers alerts through haptic vibrations, audio tones, or visual cues on a paired display. The sophistication lies in the algorithm’s ability to distinguish between intentional adjustments and true form breakdown.
Key Features to Look for in Deadlift-Specific Sensors
Not all posture sensors belong in a powerlifting gym. Office posture correctors will sabotage your training with false positives. Here’s what separates serious training tools from consumer gadgets.
Precision and Accuracy Metrics
For deadlift applications, angular accuracy should be within ±1 degree, and positional accuracy within 5 millimeters. Anything less and you’re making decisions on noise rather than signal. Check the technical specifications for static accuracy (how well it holds calibration when stationary) and dynamic accuracy (tracking precision during explosive movement). The device should maintain accuracy through the entire range of motion, from deep hip flexion at setup to full extension at lockout. Be wary of systems that don’t publish their error margins—they’re hiding something.
Latency: Why Milliseconds Matter
When you’re grinding through a max-effort rep, feedback delayed by even 200 milliseconds arrives too late to save the lift. Premium systems achieve sub-30ms latency through edge computing—processing data on the sensor itself rather than streaming to a phone for analysis. This matters most for dynamic corrections: if your lumbar spine begins to flex during ascent, you need that vibration cue immediately, not after you’ve locked out the weight. Test this by asking manufacturers about their sensor fusion frequency and whether they use predictive algorithms to anticipate movement rather than just reacting to it.
Battery Life Considerations for Training Blocks
A sensor that dies mid-session is worse than useless—it’s a distraction. For powerlifters running high-volume blocks of 2-3 hour sessions, you need minimum 8 hours of continuous use. Better systems offer 12+ hours and quick-charge capabilities. Consider standby time too; you don’t want to recharge after every session. Look for devices with smart power management that activate only when motion is detected, preserving juice between sets. Replaceable batteries can be advantageous for coaches working with multiple athletes throughout the day.
Comfort and Placement Options
The sensor must disappear during heavy lifts. Bulky units that dig into your back during floor pulls or catch on barbells during touch-and-go reps will end up in your gym bag, unused. Optimal placement for deadlift tracking is along the thoracolumbar fascia—typically between T12 and L4 vertebrae. The device should be low-profile (under 8mm thick) and weigh less than 15 grams. Strap systems should use non-slip, sweat-resistant materials that maintain position without requiring constant readjustment. Some advanced systems offer adhesive patch options for single-session competitions or testing.
Water and Sweat Resistance Ratings
Your training environment is hostile. Sweat, chalk dust, and the occasional spilled pre-workout create a corrosive cocktail. Look for IP67 or IP68 ratings—meaning the device withstands immersion and high-pressure water jets. More importantly, check if the charging port is sealed; this is the most common failure point. Magnetic charging connections offer superior protection compared to USB-C or micro-USB ports that require rubber covers.
Types of Wearable Sensors for Strength Training
Different sensor architectures serve different purposes. Understanding the categories helps you match technology to your specific deadlift weaknesses.
Lumbar Spine Monitors
Single-sensor systems focused exclusively on lumbar curvature are the most common and affordable. These excel at preventing the cardinal sin of deadlifting: lumbar flexion under load. They typically strap around your lower torso and use strain gauges or IMUs to detect spinal flexion/extension. While limited in scope, they’re incredibly effective for lifters who struggle to maintain a neutral spine. The trade-off is they won’t catch hip shift or knee valgus, but for pure spinal safety, they’re hard to beat.
Full-Torso Tracking Systems
Multi-sensor arrays spanning from cervical spine to sacrum provide comprehensive kinematic data. These systems reconstruct your entire torso as a linked segment model, showing how thoracic position influences lumbar stability. For advanced lifters experimenting with thoracic flexion techniques or coaches analyzing segmental sequencing, this granularity is invaluable. The complexity comes at a cost—both financial and in setup time. You’ll spend 5-10 minutes positioning and calibrating multiple sensors, making them impractical for daily training but essential for technical overhaul phases.
Limb-Specific Sensors
Foot pressure sensors and knee tracking bands address the often-neglected lower body components of deadlift mechanics. These devices measure weight distribution across your feet (critical for preventing bar drift) and knee tracking (identifying valgus collapse). While not strictly “posture” sensors, they complete the biomechanical picture. The integration challenge is synchronizing multiple data streams; look for systems with unified software platforms rather than cobbling together disparate apps.
Smart Clothing vs. Adhesive Patches
The form factor debate boils down to convenience versus precision. Smart clothing with integrated sensors offers seamless wearability—just pull on the shirt and train. However, the sensors are fixed in position, limiting customization for different body types. Adhesive patches provide exact placement control and can be positioned based on individual anthropometry, but require skin preparation and may irritate during high-sweat sessions. For deadlift-specific work, adhesive patches often win because you can place sensors precisely along the spinal erectors without clothing shifting during the pull.
Understanding Data Output and Metrics
Numbers without context create paralysis by analysis. Know which metrics actually matter for deadlift improvement and which are vanity data points.
Spinal Flexion/Extension Tracking
This is your bread-and-butter metric. The sensor should display real-time curves showing spinal position throughout the lift. Look for systems that quantify maximum flexion angle, rate of flexion (how quickly you lose position), and flexion duration (how long you stay compromised). The gold standard is a system that calculates cumulative spinal load—essentially a “damage points” score that accumulates based on flexion angle multiplied by time under load. This helps you understand that a brief 5-degree flexion is less concerning than sustained 3-degree flexion.
Hip Hinge Angle Analysis
Your hip hinge is the engine of the deadlift. Sensors positioned at the sacrum and thoracic spine can calculate the hip angle relative to the floor, showing whether you’re maximizing posterior chain engagement. The key metric here is hip angular velocity—how explosively you open your hips. A good system will overlay your hip velocity curve against an ideal model, highlighting sticking points where bar speed decelerates. This data is priceless for identifying whether your weakness is off the floor, at the knees, or in the lockout.
Asymmetry Detection
Subtle side-to-side shifts can indicate muscular imbalances or technical flaws. Advanced sensors detect lateral bending and rotational forces, alerting you when you’re twisting under load. This is particularly valuable for lifters recovering from unilateral injuries or those competing in strongman where uneven implements create asymmetrical demands. The system should quantify asymmetry as a percentage—anything over 5% warrants investigation and corrective work.
Velocity and Power Output
While not strictly posture data, many integrated systems calculate barbell velocity through torso movement analysis. This matters because posture breakdown often correlates with velocity loss. If your third rep moves significantly slower than your first, and lumbar flexion increases simultaneously, you’ve identified a clear work capacity limit. Power output metrics help you determine optimal training loads—when power drops 15-20% from your best rep, you’ve hit the appropriate volume for that session.
Software and App Integration: What to Demand
Hardware is only half the equation. The software ecosystem determines whether your data becomes actionable intelligence or digital clutter.
Video Sync Capabilities
The most powerful feature available is automatic video synchronization. Your phone records the lift while the sensor logs biomechanical data; post-set, you watch your form with a real-time overlay of spinal position graphs. This creates undeniable visual feedback—seeing your back round at the exact moment your hips shoot up is far more impactful than either data point alone. Ensure the system offers frame-accurate syncing and allows you to save annotated videos for long-term comparison.
Historical Progress Tracking
Motor learning is a marathon, not a sprint. Your software should maintain a database of every tracked session, showing trends in your posture consistency over weeks and months. Look for features like “form score” averaging, volume-weighted posture analysis (total tonnage lifted with good form), and comparative periodization views. The ability to tag sessions (e.g., “competition prep,” “deload,” “volume block”) helps correlate form degradation with training phases, revealing programming adjustments needed.
Customizable Alert Thresholds
Beginners need tight tolerances—alerts at the first sign of 3-degree flexion. Advanced lifters might set 8-degree thresholds for heavy singles, understanding that some deviation is acceptable under maximal loads. The software must allow per-lift customization: your alert settings for 90% 1RM singles should differ from your high-rep backoff sets. The best systems offer “coach mode” where a trainer can remotely adjust your thresholds based on daily readiness or fatigue levels.
Calibration Protocols for Accurate Deadlift Tracking
Garbage in, garbage out. A miscalibrated sensor is worse than no sensor—it gives false confidence. Proper setup is non-negotiable.
Setting Your Neutral Spine Baseline
Your “neutral” isn’t textbook neutral; it’s your anatomical neutral. Quality systems guide you through a calibration sequence: you assume your competition setup position, perform a submaximal contraction of your core, and the device records this as your zero point. Some advanced systems use a 3-point calibration (standing, hip hinge, and prone position) to map your unique spinal curvature. This process should take less than 60 seconds and be repeatable session-to-session with minimal variance.
Accounting for Individual Anthropometry
A 6'6" lifter with long femurs will have a more horizontal torso angle than a 5'6" lifter with short legs. The sensor system must account for this. Look for calibration routines that input your limb lengths, hip structure (e.g., acetabular depth), and mobility limitations. The algorithm should adjust the “acceptable movement envelope” based on your anthropometry, preventing false alerts for biomechanically sound but visually different positions. Some cutting-edge systems use machine learning to adapt to your specific movement signature over multiple sessions.
The Role of Haptic Feedback in Motor Learning
Buzzing alerts are more than annoying distractions—they’re powerful neuroplasticity tools when implemented correctly.
Vibration Patterns and Their Psychological Impact
Simple on/off vibrations create alert fatigue; your brain starts ignoring them. Sophisticated systems use pattern recognition: a single pulse for minor deviation, double pulse for moderate breakdown, and continuous vibration for dangerous form. Some devices even vibrate on one side only to indicate directional correction (“lean left”). The vibration intensity should be adjustable—too weak and you’ll miss it under adrenaline; too strong and it’ll throw off your concentration. Research shows that variable-frequency vibrations create stronger motor memory consolidation than constant alerts.
Audio Cues vs. Tactile Alerts
While haptic feedback is primary, audio cues serve a different purpose. A subtle tone through headphones can provide continuous position feedback without the jarring interruption of vibration. Think of it as a “form sonar”—the tone pitch rises as you deviate from neutral, giving you proportional awareness. This is particularly useful for lifters who use auditory cues for timing (e.g., “press the floor away”). The key is independent volume control; you should be able to mute audio during heavy singles while keeping haptic alerts active.
Multi-Athlete Support: Coaching Applications
If you’re a coach, these tools transform your ability to manage multiple athletes simultaneously. But not all systems support team environments effectively.
Team Dashboard Features
Coaching platforms should display all connected athletes in a grid view, showing each lifter’s real-time form status. Color coding helps: green for perfect form, yellow for minor deviations, red for stop-the-set breakdowns. The dashboard must update live without manual refresh and allow you to drill down into any athlete’s metrics with a single click. Look for session planning features where you preload expected sets, reps, and loads—when an athlete deviates significantly, the system flags it against the planned intensity, helping you distinguish between technical failure and systemic fatigue.
Remote Monitoring Capabilities
In the era of online coaching, remote monitoring is invaluable. Some systems allow athletes to train while you watch their biomechanical data stream live from across the country. The platform should include chat functionality, video sharing, and the ability to adjust alert thresholds on the fly. Data logging must be cloud-based with automatic backup; you can’t afford to lose a month’s worth of client data because a phone crashed. Ensure the system offers coach and athlete permission levels—you control the settings, they control their training.
Privacy and Data Security in Fitness Tech
Your movement data reveals more than your deadlift flaws—it can indicate injury status, performance capacity, and even psychological readiness. Protect it.
Understanding Data Ownership
Read the terms of service carefully. Some companies claim ownership of your biometric data and use it to train their algorithms or sell aggregated insights. Opt for services that guarantee you retain full ownership, with explicit consent required for any data usage beyond your personal analysis. GDPR-compliant companies (even if you’re not in Europe) typically offer stronger privacy protections. Ask whether you can export your raw data in standard formats (CSV, JSON) for analysis in other platforms—vendor lock-in is a real concern.
Cloud vs. Local Storage
Cloud storage enables remote coaching and device switching, but raises security questions. Local-only storage keeps data on your phone, eliminating cloud vulnerabilities but limiting functionality. The best systems offer hybrid models: real-time processing locally with optional encrypted cloud backup. For competitive athletes concerned about data leaks revealing training status, look for “competition mode” that stores data locally only and disables all external transmission. Military-grade encryption (AES-256) should be standard for any cloud features.
Price vs. Performance: Budget Considerations
The sensor market spans from $30 novelty devices to $800 professional systems. Understanding the value curve prevents overspending or dangerous under-buying.
Entry-Level Options for Beginners
Sub-$100 sensors typically use single IMUs with basic apps. They’re sufficient for detecting gross spinal flexion and building initial awareness. However, they lack the precision for advanced technical work and often have significant latency (100ms+). The real cost isn’t the purchase price—it’s the opportunity cost of learning bad habits if the sensor misses subtle breakdowns. For true beginners, these can be valuable teaching tools, but plan to upgrade within 6-12 months as your proprioception improves.
Professional-Grade Investment
Systems above $400 offer medical-grade accuracy, multi-sensor arrays, and sophisticated software. For competitive powerlifters, strength coaches, or rehabilitation professionals, this is a business expense, not a luxury. The ROI comes from prevented injuries (one avoided disc herniation pays for the system many times over) and optimized performance (improved mechanics add pounds to your total). Consider the total cost of ownership: subscription fees for software, replacement adhesives or straps, and potential upgrade paths. Some manufacturers offer trade-in programs, softening the blow of staying current.
Compatibility with Your Training Environment
Your sensor must survive your gym, not just the lab. Environmental factors can render even the best technology useless.
Barbell Contact and Sensor Durability
During sumo deadlifts, the barbell rides your thighs; conventional pulls may have the bar scrape your shins. A sensor on your lumbar spine should never contact the bar, but thoracic sensors might during shirted pulls or if you pull with the bar very close. Look for devices with reinforced housings and replaceable protective shells. Some systems include barbell clearance specifications—measure your setup to ensure compliance. The sensor should also withstand being dropped from waist height onto concrete, because it will happen.
Integration with Other Fitness Tech
Your posture sensor shouldn’t exist in a vacuum. It should integrate with heart rate monitors (correlating form breakdown with cardiovascular fatigue), barbell velocity trackers (combining posture with power output), and even force plates (ground reaction forces). Check for API availability or native integration with platforms like TrainingPeaks, CoachMePlus, or custom Google Sheets via IFTTT. The goal is a unified training dashboard where posture data contextualizes all other metrics. Bluetooth 5.0 or ANT+ connectivity ensures minimal interference in a gym full of wireless devices.
Return on Investment: Beyond Just Form Correction
The financial justification extends far beyond “better form.” Quantify the benefits to understand true value.
Injury Prevention Economics
A single serious back injury costs an average of $15,000 in medical expenses and 12 weeks of lost training. If a $500 sensor system prevents one injury over its lifespan, you’ve achieved a 30:1 ROI. But the calculation isn’t just medical bills—consider lost competition opportunities, mental health impacts from training layoffs, and the chronic pain tax you’ll pay for years. For gyms and coaches, sensors reduce liability insurance premiums and demonstrate due diligence in client safety, potentially saving thousands annually.
Performance Enhancement Through Data
Better mechanics equal more weight on the bar. A 2% improvement in leverage efficiency can translate to 5-10% increases in your 1RM without any muscle gain. Sensors help you find your optimal hip height, stance width, and grip position through data-driven experimentation. Track how subtle setup changes affect your spinal loading patterns across multiple sessions. The technology essentially provides a biomechanics lab in your training sessions, allowing A/B testing of technique variations that would be impossible to evaluate subjectively.
Potential Drawbacks and Limitations
No technology is perfect. Understanding limitations prevents disillusionment and ensures you use sensors as tools, not crutches.
Over-Reliance on Technology
The ultimate goal is developing innate proprioception so refined that you don’t need external feedback. Sensors should accelerate this process, not replace it. Athletes who become dependent on buzzing alerts often panic when the device fails or isn’t allowed in competition. Mitigate this by scheduling “sensor-free” sessions where you train purely by feel, using the device only for periodic check-ins. The sensor teaches you what perfect feels like; your job is to internalize that sensation.
Calibration Drift and Maintenance
IMUs suffer from integration drift—small errors that accumulate over time, causing position inaccuracies. High-quality systems include automatic recalibration triggers (e.g., detecting when you’re standing still between sets). You should still perform manual calibration weekly and after any firmware update. Temperature changes affect sensor accuracy; let the device acclimate to your gym environment for 10 minutes before calibration. Adhesive patches lose stickiness after 3-5 uses; budget for replacements and clean application sites with alcohol wipes for consistent adhesion.
Making Your Final Decision: A Buyer’s Framework
With dozens of options and technical specs that blur together, use this systematic approach to choose your system.
Prioritizing Your Specific Needs
Create a decision matrix scoring potential systems on your top five requirements. For a competitive powerlifter, that might be: 1) Latency under 30ms, 2) Spinal accuracy ±1°, 3) Video sync capability, 4) Competition mode privacy, 5) Barbell clearance. Assign weighted scores (e.g., latency = 30% of decision, price = 10%). This removes emotional bias and marketing influence. Rank systems objectively, then test the top two if possible. Most companies offer 30-day trials—use them for multiple heavy sessions, not just one light workout.
Trial Periods and Return Policies
Never commit to a system without a no-questions-asked return window. During the trial, test worst-case scenarios: maximal singles, high-rep sets with form breakdown, training in extreme temperatures. Keep detailed notes on false positive rates (alerts during good form) and false negative rates (missed breakdowns). A 10% error rate is acceptable; above 20% and the system will lose your trust. Check warranty terms—two years is standard for quality electronics. Read user forums for failure reports; if sensors frequently die after 6 months, that’s a red flag regardless of specs.
Frequently Asked Questions
How accurate are wearable posture sensors compared to video analysis?
Video analysis provides 2D visual feedback but lacks precision for measuring spinal curvature. Quality sensors offer ±1° accuracy for angular measurements, while video estimates typically vary ±5-10° depending on camera angle and clothing. The real advantage is timing—sensors provide millisecond-by-millisecond data synchronized to your movement, whereas video requires manual frame-by-frame analysis. Use both: sensors for quantitative tracking and video for qualitative movement assessment.
Can these sensors differentiate between conventional and sumo deadlift forms?
Advanced systems with customizable movement envelopes can distinguish between styles. You’ll calibrate a different neutral spine baseline for each—sumo typically allows slightly more thoracic flexion due to the more upright torso angle. The software should let you save separate profiles and automatically switch based on your setup position. Entry-level sensors may flag sumo form as “incorrect” due to their rigid algorithms, so ensure the system explicitly supports multiple deadlift variations.
Will wearing a sensor affect my lifting performance or feel?
A properly fitted, low-profile sensor (under 15 grams) becomes unnoticeable within 2-3 sessions. The psychological effect is typically positive—most lifters report increased confidence knowing they’re maintaining position. However, bulky or poorly placed sensors can alter your setup or cause you to pull away from the device, changing your bar path. Test the sensor during submaximal training before using it in competition prep. If you find yourself adjusting your stance to avoid the device, it’s either poorly designed or incorrectly positioned.
How long does it take to see form improvements using these devices?
Most users notice reduced spinal flexion within 2 weeks of consistent use, but lasting motor pattern changes require 6-8 weeks of training. The sensor accelerates awareness, but your nervous system still needs time to myelinate new pathways. Studies show that real-time feedback reduces error rates by 40-60% immediately, but retention drops to 20% after removing the device. Sustained improvement requires a phased approach: 4 weeks with continuous feedback, 4 weeks with intermittent feedback (every other set), then periodic check-ins. Think of it as training wheels for proprioception.
Are posture sensors legal in powerlifting competitions?
Currently, no major federation (IPF, USAPL, USPA) allows electronic devices on the platform during competition. However, you can use them extensively in training and during warm-ups in the back room. Some federations permit them in training halls at multi-day events. Always check your specific federation’s technical rules. For competition day, use the sensor during your last heavy training session 7-10 days out to ensure your peaking protocol maintains form, then rely on the internalized motor patterns on meet day.
What happens if the sensor gives a false alert during a heavy lift?
False positives are inevitable, especially during max efforts where form naturally deviates slightly. Program your device with appropriate thresholds for heavy singles—perhaps 8-10° flexion tolerance instead of 3° for backoff sets. If you get an unexpected alert, finish the rep safely, then review the data. Most apps let you flag reps as “false positive,” training the algorithm to your specific patterns. If false alerts exceed 10% of reps, recalibrate or adjust thresholds. Never ignore alerts reflexively; investigate whether your “good form” is actually compensatory.
Can I use one sensor for multiple exercises beyond deadlifts?
Absolutely, but effectiveness varies by movement. Squats benefit enormously from lumbar tracking, especially identifying “butt wink.” Overhead press and bench press use thoracic sensors to monitor rib cage position and scapular retraction. Olympic lifts are more challenging due to barbell contact and explosive movement, requiring higher sensor ranges. Most systems include exercise libraries with pre-configured alert settings. The real value comes from tracking posture consistency across your entire training session—identifying whether your core fatigues globally after heavy squats, affecting subsequent deadlift form.
Do I need technical expertise to interpret the data?
Quality systems abstract complexity into actionable scores. You don’t need an engineering degree to understand a “form score” of 85/100 or a red warning icon. However, deeper analysis does require learning basic biomechanics. Invest time in understanding what different curve shapes mean: a sharp spike in flexion suggests a technique flaw, while gradual drift indicates fatigue. Most apps include educational modules and example videos showing “good” vs. “bad” data patterns. Start with simple metrics (max flexion angle) and progressively explore advanced features as your knowledge grows.
How do I know if my spine is actually neutral or just “sensor-neutral”?
This is the philosophical core of using biomechanical tech. “Sensor-neutral” means you’ve calibrated the device to a position that feels strong and stable for your anatomy. This may not match textbook neutral spine definitions, and that’s okay. The key is consistency—your calibrated neutral should be reproducible and pain-free. Periodically verify by training without the sensor and having a coach video your heaviest sets. If your “sensor-neutral” position holds up under load and passes visual inspection, you’ve found your true neutral. The sensor teaches you what optimal feels like in your body, not in a textbook.
What’s the difference between a $50 sensor and a $500 one?
The gap isn’t just accuracy—it’s ecosystem and durability. A $50 sensor uses a single consumer-grade IMU with basic fusion algorithms, 100ms+ latency, and a generic app. It’ll catch major spinal flexion but miss nuances and may not survive gym abuse. A $500 system uses medical-grade components, sub-30ms processing, multi-sensor fusion, customizable software, secure data handling, and integrates with professional coaching platforms. The expensive option includes customer support, regular firmware updates, and a community of serious users. For casual lifters, $50 might suffice. For competitive athletes or coaches, the $500 system’s ROI justifies the price difference within one training cycle.