Lacrosse isn’t played in climate-controlled laboratories—it’s battled out under unpredictable skies, on fields that transform from pristine grass to muddy battlegrounds with a single downpour. Nothing tests your gear’s mettle quite like a spring thunderstorm followed by a fourth-quarter goal-mouth scrum. While your helmet’s primary job is protection, those decals representing your team, your number, your identity—are getting bombarded by forces that would peel paint off steel.
You’ve seen it happen: edges curling after a rainy tournament, colors bleeding into a brownish mess, or mud grinding away at intricate designs until they’re unrecognizable. The frustration of replacing decals mid-season isn’t just about cost—it’s about pride, professionalism, and the distraction of equipment failure when focus matters most. As we look toward 2026’s innovations in sports materials science, understanding what makes lacrosse helmet decals truly weatherproof has never been more critical for players, equipment managers, and program directors who demand performance that matches their passion.
Top 10 Lacrosse Helmet Decals for Rain and Mud
Detailed Product Reviews
1. 50Pcs Lacrosse Stickers - Vinyl Waterproof Decals for Water Bottles, Laptop, Helmet

Overview: This budget-friendly bundle delivers 50 vinyl lacrosse stickers measuring between 2.5-3.15 inches, designed for personalizing water bottles, laptops, helmets, and other smooth surfaces. The die-cut decals feature assorted lacrosse-themed designs and utilize non-marking adhesive for clean removal, making them suitable for temporary or evolving decoration projects.
What Makes It Stand Out: The exceptional price point combined with waterproof vinyl construction makes this an accessible entry-level option. The non-marking glue allows repositioning without residue, while the die-cut shaping ensures professional-looking application without manual trimming. The variety pack approach offers diverse designs for comprehensive customization projects across multiple belongings.
Value for Money: At $2.99 ($0.06 per sticker), this represents the lowest cost-per-unit in the category. The waterproof durability extends lifespan, making it ideal for high-traffic items like water bottles and helmets. While premium alternatives exist, this pack delivers functional decoration for bulk applications without financial commitment, perfect for experimentation.
Strengths and Weaknesses: Pros: Unbeatable price; generous quantity; waterproof and fade-resistant material; residue-free removal; versatile sizing for multiple surfaces. Cons: Product description confusingly mentions “Bigfoot” designs, suggesting possible copy-paste errors; no brand reputation or warranty; adhesive strength may vary; limited size consistency.
Bottom Line: Perfect for coaches rewarding entire teams, party favors, or budget-conscious teens wanting maximum coverage. Accept quality trade-offs for quantity and price.
2. 50 Pieces Lacrosse Stickers, Lacrosses Vinyl Stickers for Water Bottle, Helmet, Laptop, Phone, Lacrosses Gifts, Ball Party Favors, Sport Stickers Lacrosse Decorations for Kids Teens Boy

Overview: This 50-piece collection targets kids, teens, and adults with lacrosse-themed vinyl stickers sized 2-3 inches. Made from premium PVC with sun protection, these waterproof decals suit water bottles, helmets, laptops, and phones. The manufacturer guarantees no duplicates and offers customer service support, positioning it as a reliable mid-tier option.
What Makes It Stand Out: The sun-protection layer distinguishes this from basic vinyl options, preventing fade during outdoor use. The reusable adhesive allows multiple repositioning attempts without degradation. A clear service guarantee provides purchase confidence, while the assurance of 50 unique designs eliminates disappointment from repeats—critical for gift-giving.
Value for Money: At $4.39 ($0.09 per sticker), this sits in the sweet spot between bargain and premium. The added UV protection and reusable backing justify the 50% price increase over budget options. For items exposed to sunlight—like car bumpers or bike helmets—this premium prevents premature fading, delivering long-term value that cheaper alternatives cannot match.
Strengths and Weaknesses: Pros: UV-resistant coating; truly unique designs; reusable adhesive; waterproof PVC; responsive customer service; suitable for outdoor applications. Cons: Higher cost-per-unit than basic packs; adhesive may lose strength after multiple reapplications; limited size range may not fit all helmet styles.
Bottom Line: Ideal gift for serious players or outdoor enthusiasts. The UV protection and quality guarantee make it worth the modest premium for durable, long-lasting personalization.
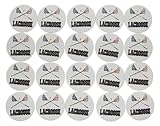
3. 4 Sheets 100 Pcs Lacrosse Stickers 1 Inch Self Adhesive Vinyl Lacrosse Helmet Hockey Helmet Decals Assorted Lacrosse Party Favors for Hockey Batting Car Wall Water Bottles Decor

Overview: Designed specifically for team motivation, this set includes four sheets totaling 100 small lacrosse stickers, each approximately one inch in diameter. Featuring “LAX” text and lacrosse graphics, these vinyl decals target helmet decoration and player rewards for coaches and team managers seeking systematic incentive tools rather than casual decoration.
What Makes It Stand Out: The compact size perfectly fits helmet contours without overwhelming the design. The bulk quantity enables systematic team-wide reward programs. Unlike decorative packs, this serves a functional motivational purpose, making it unique among recreational sticker sets. The sheet format allows organized distribution during games or practices.
Value for Money: At $5.99 for 100 stickers, the per-sticker cost rivals budget options despite specialized sizing. For coaches equipping entire teams or running season-long incentive programs, this bulk approach eliminates piecemeal purchasing. The durability ensures stickers survive full seasons of outdoor play, making it a cost-effective team management tool rather than a consumer novelty.
Strengths and Weaknesses: Pros: Ideal 1-inch helmet proportions; exceptional bulk quantity; waterproof vinyl; residue-free removal; purposeful team motivation design; cost-effective for large groups. Cons: Small size limits graphic detail; minimal design variety across sheets; less suitable for laptops or large water bottles; purely sports-focused aesthetic.
Bottom Line: The ultimate choice for lacrosse coaches and team parents. Bulk quantity and helmet-optimized sizing make it perfect for rewarding players and building team identity, though less versatile for general decoration.
4. Lacrosse - 3" Vinyl Sticker - for Car Laptop Water Bottle Phone - Helmet and Sticks Decal

Overview: GT Graphics offers a premium single 3-inch lacrosse decal featuring helmet and sticks imagery. This American-made vinyl sticker emphasizes quality over quantity, targeting enthusiasts wanting a bold, fade-resistant statement piece for cars, laptops, or water bottles where one perfect application outweighs multiple mediocre attempts.
What Makes It Stand Out: As the only American-manufactured option, it carries brand credibility and quality assurance. The fade-resistant vinyl withstands harsh outdoor conditions, while the substantial 3-inch size commands attention. Professional-grade adhesive ensures permanent placement without edge-lifting, distinguishing it from budget multi-packs that prioritize quantity over longevity.
Value for Money: At $3.99 for a single sticker, the cost-per-unit seems steep compared to bulk alternatives. However, the premium materials, domestic manufacturing, and brand reputation justify the price for quality-conscious buyers. This isn’t for covering multiple items—it’s for creating one perfect, long-lasting statement on a prized possession where failure isn’t acceptable.
Strengths and Weaknesses: Pros: Superior fade-resistant vinyl; American-made quality; strong permanent adhesive; generous 3-inch display size; branded design credibility; ideal for high-visibility applications. Cons: Single-unit limitation; highest cost-per-sticker; no variety or backup options; overkill for temporary or experimental decoration.
Bottom Line: Choose this for premium applications where quality and durability matter most. Perfect for a car window, varsity locker, or championship water bottle where one perfect decal outshines dozens of mediocre ones.
5. GOLEEX 20 Pack Pcs Waterproof Vinyl Lacrosse Stickers Items for Men Adults Teens Kids Scrapbooking Planners Laptop Helmet Cars Bottles Sports Team Decals Sticker Sets Supplies

Overview: GOLEEX positions itself as a premium option with 20 waterproof vinyl lacrosse stickers designed for demanding applications like vehicle exteriors. The set targets adults and teens seeking durable team decals for water bottles, helmets, cars, and sports equipment where adhesive failure would be costly or embarrassing.
What Makes It Stand Out: The heavy-duty adhesive formulation specifically addresses outdoor vehicle use, resisting weather extremes without peeling. A customer satisfaction commitment provides post-purchase support—rare in the sticker market. The curated selection focuses on meaningful designs rather than sheer quantity, appealing to serious athletes who view stickers as team identity markers, not just decoration.
Value for Money: At $9.95 ($0.50 per sticker), this commands the highest per-unit price. The premium reflects weatherproof construction and reinforced adhesive rather than bulk savings. For vehicle applications where failure isn’t an option, the cost is justified. For casual water bottle decoration, cheaper alternatives suffice. You’re paying for reliability, not abundance.
Strengths and Weaknesses: Pros: Heavy-duty weatherproof adhesive; excellent customer support; high-quality vinyl construction; suitable for exterior vehicle use; curated adult-focused designs. Cons: Highest cost-per-sticker; limited 20-count quantity; over-engineered for indoor use; no mention of UV protection; premium price may deter budget buyers.
Bottom Line: Justified for vehicle owners and outdoor gear enthusiasts requiring maximum adhesion. Casual users should opt for budget packs. The customer support adds value for those needing guaranteed performance.
6. Novel Merk Lacrosse Sports Vinyl Stickers - 2” Round Individual Decals for Laptop, Water Bottle, Party Favors, & Decor - Adheres to Clean Surfaces & Waterproof (20 Pack)
Overview: These versatile lacrosse-themed vinyl stickers from Novel Merk offer a 20-pack of 2-inch round decals perfect for personalizing gear, creating party favors, or adding flair to events. Designed for clean surfaces like laptops, water bottles, and phone cases, these American-made stickers feature a crossed lacrosse stick design that resonates with players and fans alike. The waterproof construction ensures durability across various applications.
What Makes It Stand Out: The generous 2-inch size makes these stickers more visible than standard helmet decals, while the crossed lacrosse design delivers clear sporting identity. Being manufactured in the USA ensures quality control and supports domestic production. Their versatility extends beyond personal use to carnival prizes, goody bag stuffers, and party decorations. The waterproof vinyl construction means they’ll withstand daily wear on water bottles and outdoor gear without fading or peeling.
Value for Money: At $6.95 for 20 stickers ($0.35 per unit), these sit in the mid-range price point. While not the cheapest option, the 2-inch size, waterproof rating, and domestic manufacturing justify the cost. They offer better value than single large decals while providing more flexibility than bulk team packs intended purely for helmets.
Strengths and Weaknesses: Strengths include versatile sizing, waterproof durability, made-in-USA quality, and multi-use functionality for both personal expression and event gifting. Weaknesses are the generic design may not suit teams wanting custom branding, and the 2-inch size is too large for standard helmet award placement. The adhesive, while strong, may leave residue on some surfaces.
Bottom Line: Ideal for lacrosse enthusiasts wanting to showcase their passion on personal items or event organizers seeking affordable, thematic decorations. These stickers bridge the gap between individual expression and bulk party favors effectively.
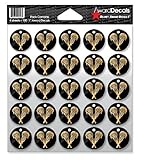
7. Award Decals Lacrosse Sticks Sticker Set (100 Decals) 1" The Original Premium 20mil Thick Helmet Decals Made in The USA Since 1976

Overview: Award Decals brings nearly five decades of expertise with this premium 100-pack of 1-inch lacrosse helmet decals. As the original helmet decal company since 1976, these stickers feature heavy-duty 20mil vinyl construction designed specifically for athletic gear. Each package contains four sheets totaling 100 individual decals, engineered to withstand the rigors of competitive play while recognizing player achievements.
What Makes It Stand Out: The 20mil thickness is substantially more durable than standard stickers, preventing tears and peeling during intense gameplay. This heritage brand’s longevity speaks to consistent quality trusted by coaches nationwide. The decals are specifically designed for helmet application, ensuring proper adhesion to curved surfaces while remaining removable without damage. Their purpose-built nature for athletic awards sets them apart from decorative stickers.
Value for Money: At $18.99 for 100 decals ($0.19 each), these offer excellent bulk pricing for team budgets. The per-unit cost is lower than smaller packs, making them economical for season-long incentive programs. While the initial investment exceeds hobbyist options, the professional-grade durability and brand reputation justify the premium for serious programs.
Strengths and Weaknesses: Strengths include exceptional durability, specialized helmet design, established brand reputation, and cost-effective bulk pricing. Weaknesses are the 1-inch size limits visibility, the design is utilitarian rather than decorative, and the higher upfront cost may not suit individual buyers. Some users may find the adhesive too aggressive for easy repositioning.
Bottom Line: A must-have for coaches and team managers seeking professional-grade award decals that will last an entire season. The heritage quality and bulk value make this the gold standard for lacrosse helmet recognition programs.
8. SportStar Lacrosse Helmet Award Decals - Lax Stick (20 Stickers)

Overview: SportStar offers an entry-level solution for lacrosse helmet recognition with this 20-pack of 1-inch award decals. Designed for smooth surfaces, these stickers feature a clear background that allows the helmet’s color to show through, creating a seamless look. The repositionable adhesive provides flexibility during application, making them forgiving for first-time users or younger players applying their own awards.
What Makes It Stand Out: The clear background design is a key differentiator, allowing team colors to remain visible rather than covering them with white vinyl. Repositionability is rare in this category, enabling perfect placement without waste. At just 20 decals per pack, this offering targets smaller teams or individual players wanting professional-looking awards without committing to bulk quantities. The “Lax Stick” branding appeals to modern lacrosse culture.
Value for Money: Priced at $4.49 for 20 stickers ($0.22 each), these represent a middle ground between bulk professional packs and individual decorative decals. While costlier per unit than 100-count options, the lower total price benefits those with modest needs. The repositionable feature adds value by reducing application errors and wasted decals.
Strengths and Weaknesses: Strengths include clear background integration, repositionable adhesive, affordable entry price, and modern branding. Weaknesses are thinner material than premium 20mil options, limited quantity per pack, and potentially less durable for full-contact play. The adhesive may lose effectiveness after multiple repositionings, and the design simplicity lacks the gravitas of thicker decals.
Bottom Line: Perfect for youth teams, small programs, or players wanting to test helmet decals before investing in bulk. The clear background and repositionable feature make these user-friendly, though durability concerns suggest they’re better suited for practice recognition than game-day awards.
9. Lacrosse Mom Sticker - 3" Laptop Sticker - Waterproof Vinyl for Car, Phone, Water Bottle - Lacrosse Mom Decal
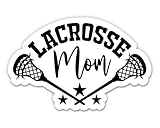
Overview: This dedicated “Lacrosse Mom” decal celebrates parental support with a 3-inch waterproof vinyl sticker designed for high visibility. Sized at 3" x 1.9", this American-made decal targets the passionate parent demographic, offering versatile application across vehicles, devices, and drinkware. The design specifically acknowledges the role of lacrosse mothers in supporting their athletes.
What Makes It Stand Out: The targeted “Lacrosse Mom” messaging creates an emotional connection absent in generic lacrosse stickers. At nearly 3 inches wide, this decal commands attention compared to smaller 1-inch helmet awards. The reusable adhesive is a standout feature, allowing transfer between surfaces as vehicles or devices change. Weatherproofing ensures durability on car exteriors through all seasons.
Value for Money: At $4.99 for a single decal, this is premium pricing, but justified by the specialized design and larger size. Comparable generic stickers cost less, but the specific lacrosse mom branding and reusability features add unique value. It’s positioned as a gift item rather than a bulk commodity, explaining the higher per-unit cost.
Strengths and Weaknesses: Strengths include targeted emotional appeal, generous size, reusable adhesive, weatherproof durability, and made-in-USA quality. Weaknesses are the niche audience excludes players and fathers, single-unit purchase limits value, and the size may be too large for some preferred surfaces. The specific branding reduces versatility for resale or team-wide distribution.
Bottom Line: An excellent gift for lacrosse mothers wanting to display pride in their child’s sport. The quality construction and reusable feature justify the premium price for this specialized demographic. Ideal for Mother’s Day, team banquets, or tournament souvenirs.
10. Award Decals Lacrosse Sticker Set (100 Decals) 1" The Original Award Decals Premium 20mil Thick Helmet Decals Made in The USA Since 1976
Overview: This 100-pack from Award Decals, Inc. delivers the same premium 20mil thick vinyl construction that has made them the original helmet decal authority since 1976. With four sheets totaling 100 individual 1-inch decals, this set provides coaches with a season’s worth of player recognition. The heavy-duty design specifically targets the demanding environment of lacrosse helmets, ensuring awards remain intact through practices and games.
What Makes It Stand Out: As the pioneering company in helmet decals, Award Decals offers unmatched heritage and specialization. The 20mil thickness provides double the durability of standard 10mil stickers, preventing curling and tearing. These decals maintain color vibrancy despite sweat, friction, and weather exposure. The brand’s five-decade legacy means consistent sizing and adhesive formulas that work reliably across all helmet brands and models.
Value for Money: At $18.99 ($0.19 per decal), this bulk pack offers exceptional value for organized programs. The per-unit cost rivals generic stickers while delivering professional-grade durability. For teams awarding 2-3 stickers weekly per player across a season, this quantity and pricing structure makes budget management straightforward. The investment pays dividends in reduced replacement needs.
Strengths and Weaknesses: Strengths include industry-leading thickness, proven adhesive technology, bulk quantity efficiency, and American manufacturing heritage. Weaknesses are the utilitarian design lacks decorative flair, 1-inch size limits individual impact, and the professional focus may overwhelm casual users. The aggressive adhesive requires careful initial placement.
Bottom Line: The definitive choice for serious lacrosse programs prioritizing durability and tradition. While overkill for individual decorative use, these decals represent the professional standard for team-wide helmet award systems, backed by a legacy of quality that justifies every penny.
Understanding the Elements: What Rain and Mud Actually Do to Your Decals
Before diving into solutions, let’s dissect the problem. Water and mud aren’t just messy—they’re chemically and physically aggressive forces that attack decals at a molecular level. Rain creates capillary action along decal edges, allowing moisture to wick underneath and compromise adhesive bonds. Meanwhile, mud acts as both an abrasive paste and a moisture-retention system, grinding against surfaces while keeping them damp for hours after the final whistle.
The Science of Water Infiltration and Adhesive Breakdown
Water molecules are deceptively destructive. When rainwater hits a helmet decal, it doesn’t just sit on top—it seeks entry points. Modern pressure-sensitive adhesives rely on microscopic contact points with the helmet surface. Water exploits any gap, forming a boundary layer that effectively “unsticks” the decal through a process called interfacial displacement. This is why edge lift is almost always the first sign of failure.
Temperature fluctuations compound the issue. As helmets heat up in the sun and cool down post-game, the differing expansion rates between decal material, adhesive, and helmet shell create micro-gaps. Water rushes in, and the freeze-thaw cycles common in early spring tournaments can expand these gaps exponentially.
Mud’s Multi-Stage Attack: From Slick to Caked-On Abrasive
Mud assaults decals in three distinct phases. Initially, it’s a slick, watery film that seeps into every crevice. As it dries, it becomes a clay-like substance that contracts and pulls at decal edges. The final stage—fully dried and caked—transforms into sandpaper, abrading the decal’s protective topcoat every time you brush it off or bump helmets.
Field composition matters enormously. Clay-based infields mixed with synthetic turf infill create a particularly vicious slurry that contains micro-plastics and silica. These particles are harder than the urethane materials used in most decals, essentially turning your helmet into a polishing wheel that’s grinding away your team logo one play at a time.
Material Science: Building Blocks of Weatherproof Decals
The decal industry’s response to these challenges has evolved from simple vinyl stickers to sophisticated multi-layer composites. Understanding these materials is your first step toward making an informed decision.
Polyurethane Domination: Why It’s the Gold Standard
Polyurethane films have revolutionized helmet decal durability. Unlike traditional vinyl, thermoplastic polyurethane (TPU) offers inherent elasticity that allows it to flex with helmet impacts without cracking. The material’s closed-cell structure blocks water at a molecular level, while its abrasion resistance is measured in thousands of cycles on the Taber test.
For 2026, we’re seeing cross-linked polyurethane networks that create self-leveling properties. Minor scratches literally heal themselves when exposed to body heat. The latest generation also incorporates UV stabilizers that are chemically bonded to the polymer chain rather than simply mixed in, preventing them from washing out during repeated cleanings.
Nano-Coating Innovations for 2026
The real game-changer arriving in 2026 is the integration of ceramic nano-coatings. These aren’t just sprays—they’re molecular layers applied during manufacturing that create a hydrophobic surface with contact angles exceeding 150 degrees. Water beads and rolls off like mercury, carrying dirt particles with it.
More impressively, these coatings create a “lotus effect” that makes mud adhesion nearly impossible. When a muddy ball splatters across your helmet, the slurry can’t grip the surface, reducing cleaning abrasion by up to 70%. Some formulations even incorporate photocatalytic titanium dioxide that breaks down organic matter when exposed to sunlight, essentially making your decals self-cleaning.
Vinyl Variations: When They Work and When They Don’t
While polyurethane dominates premium offerings, advanced calendered vinyl still has its place—primarily in budget-conscious programs. The key is identifying “cast vinyl” versus “calendered vinyl.” Cast vinyl maintains flexibility and conforms better to helmet curves, while standard calendered vinyl becomes brittle and prone to cracking in cold, wet conditions.
For wet environments, avoid monomeric vinyl at all costs. It contains plasticizers that migrate out when exposed to water and sweat, causing shrinkage and edge curl. Polymeric vinyl, though more expensive, retains its plasticizers and can survive multiple seasons with proper care.
Thickness Engineering: Microns That Matter
Here’s a counterintuitive truth: thicker isn’t always better. A 12-mil decal might seem more durable than a 6-mil version, but that extra thickness creates rigidity that prevents it from conforming to helmet contours. Water pools at the edges of thick, stiff decals, accelerating lift.
The sweet spot for lacrosse helmets lies between 8-10 mils total construction. This includes a 2-mil topcoat, 5-6-mil printed film, and 1-2-mil adhesive. This sandwich provides enough substance to resist abrasion while remaining pliable enough to seal tightly against the helmet’s complex geometry.
Adhesive Technology: The Make-or-Break Factor
Your decal’s material is only as good as its adhesive. This invisible layer is where most weatherproofing battles are won or lost, and 2026’s advancements are focusing here with laser precision.
Pressure-Sensitive vs. Heat-Activated: Pros and Cons
Pressure-sensitive adhesives (PSAs) dominate the market because they activate with simple pressure—no heat guns required. Modern PSAs for helmet decals use acrylic formulations with micro-sphere technology that creates thousands of tiny contact points. This design allows moisture to escape during initial application while forming a vacuum-like seal once set.
Heat-activated adhesives, though less common, offer superior bonding in extreme conditions. They require a heat gun during installation, which melts the adhesive into the helmet’s microscopic surface texture. The downside? Improper heating creates weak spots, and re-work is nearly impossible without destroying the decal.
Edge-Seal Advancements Preventing Lift
The Achilles’ heel of any decal is its edge. 2026’s leading solutions incorporate “edge-seal” adhesives that extend 2-3mm beyond the printed area with a clear, ultra-aggressive bonding agent. This creates a transparent perimeter that’s nearly invisible but acts like a gasket, preventing water entry.
Some manufacturers are embedding capillary breakers—microscopic ridges at the decal’s edge that disrupt water’s surface tension. Instead of wicking underneath, water droplets are forced to bead and roll away. It’s a simple physics solution to a complex chemistry problem.
UV-Cured Adhesives: The New Frontier
The most exciting development uses ultraviolet light-cured adhesives. During manufacturing, these adhesives are partially set with UV exposure, creating a “tacky-but-not-sticky” state. When you apply the decal, it conforms perfectly, then fully cures over 24-48 hours when exposed to ambient light.
This technology eliminates the “air channel” problem common with traditional wet applications. The adhesive flows into every microscopic valley of the helmet surface, creating a bond that’s actually stronger than the decal material itself. In lab tests, UV-cured adhesives maintain 95% of their bond strength after 500 hours of saltwater spray testing.
Design Architecture for Maximum Durability
How your decal is designed—its shape, colors, and finish—directly impacts its ability to survive the season. Smart design isn’t just aesthetic; it’s structural engineering.
Strategic Ventilation Integration
Modern lacrosse helmets have complex vent patterns that decals must navigate. The worst approach is a solid shape that bridges multiple vents. Flex points concentrate stress here, and water pools in the bridges.
Optimal designs use “vent-aware” layouts where decal elements align with helmet geometry, leaving vent areas clear or using micro-perforations that allow the decal to flex without lifting. Some 2026 designs incorporate “stress relief cuts”—laser-cut slits invisible to the naked eye that dissipate tension across the decal’s surface.
Colorfast Pigments: What “Fade-Proof” Really Means
That vibrant red that pops under stadium lights will bleed into a pink mess if the wrong pigments are used. Weatherproof decals employ solvent-based inks with pigment particles encapsulated in acrylic polymers. This prevents water from reaching the colorant.
For 2026, “sub-surface printing” is becoming standard. The graphic is printed on the underside of a clear polyurethane layer, essentially encasing the ink in a waterproof sandwich. This not only prevents fading but also protects against abrasion—if the top layer gets scuffed, the color remains pristine underneath.
Finish Selection: Gloss, Matte, or Satin for Wet Conditions
Finish choice dramatically impacts mud shedding. Gloss finishes have the lowest surface energy, making them slickest and easiest to clean. However, they create glare under lights and show scratches more readily.
Matte finishes diffuse light beautifully but have microscopic texture that can trap mud particles. The compromise is satin or “soft gloss” finishes that offer 85% of gloss’s cleanability while maintaining a professional, non-reflective appearance. For 2026, we’re seeing “adaptive finishes” that become more hydrophobic when wet—a chemical response that actively repels water on contact.
Application Mastery: Installation as a Weatherproofing Strategy
Even the world’s best decal will fail if applied incorrectly. The installation process is your opportunity to create a foundation that repels water from day one.
Surface Prep Protocols That Eliminate Failure Points
Helmet manufacturers mold shells with release agents that prevent decals from bonding. You must remove these. The process starts with isopropyl alcohol washing, followed by a “degreasing” pass using a 50/50 mix of water and mild dish soap. The critical step is a final wipe with a silicone-free surface prep solution that leaves zero residue.
Never skip the “tack test.” After cleaning, press a piece of masking tape to the helmet surface. If it peels off with resistance, you’re ready. If it lifts easily or leaves adhesive behind, contamination remains. In wet climates, consider a light abrasion with 2000-grit wet sandpaper to create a micro-texture for better adhesion—just avoid damaging the helmet’s protective coating.
Environmental Controls: Temperature and Humidity Windows
The ideal application environment is 65-75°F with relative humidity below 60%. Cold makes adhesives brittle and unresponsive; heat causes them to flow too quickly, creating bubbles. Humidity is the silent killer—water vapor in the air gets trapped under the decal during application, creating microscopic blisters that expand into failure points.
If you’re applying decals in the field (as many teams do mid-season), use a portable canopy to shield from direct sun and rain. Keep decals in a cooler until application—warm decals stretch and distort. A simple hair dryer can warm a cold helmet shell to the proper temperature window in minutes.
Curing Time: The Critical 24-72 Hour Period
Patience is non-negotiable. Adhesives achieve full bond strength over time, not instantly. During the first 24 hours, avoid exposing the helmet to water, extreme temperatures, or friction. Don’t stack helmets decal-to-decal; use helmet racks that prevent contact.
The 72-hour mark is when most adhesives reach 90% of their ultimate strength. Mark your calendar—schedule decal application at least three days before the first game. For tournaments, apply decals a full week ahead. This curing period allows the adhesive to “wet out” completely, filling every microscopic void and creating a watertight seal.
Maintenance Regimens That Preserve Integrity
Post-game care separates decals that last one season from those that survive three. Your cleaning routine either preserves the weatherproofing or accelerates its demise.
Post-Game Cleaning: The Right Techniques
Never use pressure washers. The 2000+ PSI stream forces water under decal edges with surgical precision. Instead, use a low-pressure hose (under 100 PSI) and a soft-bristle brush. Work from the center of the decal outward—never brush toward the edges.
Cleaning solutions matter. pH-neutral sports equipment cleaners are ideal. Avoid citrus-based degreasers; they’re acidic and attack adhesive bonds over time. For mud caked on, let it dry completely, then brush it off dry before introducing water. Wet mud smears and grinds into the decal’s surface.
Mid-Season Inspection Checkpoints
Every two weeks, conduct a 30-second decal audit. Run your fingernail along all edges—any lift you can catch with a nail needs immediate attention. Look for cloudiness in the finish, indicating moisture infiltration. Check high-stress areas: near vent holes, along the facemask flange, and anywhere the decal bridges a curve.
Catching edge lift early allows for intervention. A tiny dab of edge-seal adhesive applied with a toothpick can stop progression. Waiting until you can peel a corner with your fingers means you’re already too late—the adhesive has failed and water is undermining the entire decal.
Off-Season Storage Strategies
Store helmets decal-side up in a climate-controlled environment. Basements and garages experience humidity swings that cause decals to breathe—expanding and contracting until they delaminate. Use silica gel packs in storage bins to maintain dry conditions.
Never stack helmets inside each other. The pressure and friction will roll decal edges. Instead, use wall-mounted racks or individual helmet bags that allow air circulation. If you must stack, place a soft cloth between each helmet and rotate their position monthly to prevent compression set in the adhesive.
Compliance and Safety: Navigating 2026 Regulations
Durability means nothing if your decals violate safety standards. The regulatory landscape continues to evolve, particularly around what can and cannot be applied to certified helmets.
NOCSAE Considerations: What Decals Are Allowed
NOCSAE (National Operating Committee on Standards for Athletic Equipment) certification is non-negotiable. The critical rule: decals cannot interfere with helmet performance or obscure inspection information. This means avoiding coverage of impact zones and certification stickers.
For 2026, NOCSAE is tightening requirements on decal thickness in specific zones. Any area within 1.5 inches of a vent hole is now considered a “flex zone,” where decals thicker than 8 mils may void certification. Check with your helmet manufacturer for “decal maps” showing approved coverage areas.
NFHS and NCAA Rule Updates for 2026
The NFHS (National Federation of State High School Associations) has clarified that reflective or metallic decals are prohibited in game play, as they can distract opponents. This impacts many “chrome” finishes that were popular for their weather resistance.
NCAA rules now require that any decal covering more than 30% of a helmet’s side surface must be tested for “dynamic peel resistance” at -10°F. This addresses cold-weather failures where decals detach during impact, potentially obscuring vision. When ordering custom decals, request compliance documentation specific to your governing body.
Customization vs. Resilience: Finding Your Balance
Intricate, multi-color designs look stunning in team photos but create multiple failure points. Smart customization balances visual impact with structural integrity.
Complex Multi-Layer Designs and Weatherproofing
Every layer is a potential water entry point. Designs with four or more stacked colors create a topographical map where edges can lift. The solution is “simulated layering”—using advanced printing to create the illusion of layers without the physical stack-up.
For truly complex designs, consider “puzzle piece” construction where each color is a separate decal piece with minimal overlap. This isolates failures; if one piece lifts, it doesn’t take the entire design with it. The gaps between pieces are filled with clear edge-seal adhesive, creating a seamless look with superior weather resistance.
Team Branding Elements Built to Last
Mascots with fine details—whiskers, feathers, text—are prone to failure. Simplify these elements for helmet applications. A 2-inch team logo on a helmet is viewed from 10+ feet away; intricate details are lost anyway. Bold, clean lines survive better and are more recognizable during gameplay.
Consider “negative space” designs where the helmet’s base color becomes part of the graphic. This reduces decal coverage area by up to 40%, minimizing water entry points while maintaining brand impact. Many top programs are moving toward designs that use a single large element with the helmet color providing contrast.
Player Personalization Without Compromising Protection
Player numbers and names add personalization but create edges. Opt for “inset” designs where numbers are placed in naturally recessed helmet areas rather than spanning convex curves. Use fonts with rounded terminals—sharp points are peel initiation sites.
For name bars, a single continuous piece across the helmet back is more weatherproof than individual letters. The latest trend is “ghost printing”—using the helmet’s base color as the text background with a thin outline decal, eliminating large solid areas that trap water.
Economic Considerations: True Cost of Ownership
The cheapest decal isn’t the most economical. Weatherproof decals represent an investment that pays dividends in reduced replacement frequency and maintained appearance.
Price-Performance Ratios Explained
Entry-level decals at $10-15 each might survive a month of wet play. Premium weatherproof options at $30-40 can last three seasons with proper care. That’s a per-season cost of $5-13 versus $10-15—a savings that multiplies across a 40-player roster.
Factor in labor costs. Replacing failed decals mid-season requires staff time: removal, surface prep, application, and curing. At $25/hour labor, a 30-minute replacement adds $12.50 per incident. A decal that fails on 20 helmets costs your program $250 in labor alone.
Warranty Coverage: What to Look For
Reputable manufacturers now offer weather-specific warranties. Look for “pro-rated replacement” policies covering edge lift, fading, and abrasion. The best warranties specify coverage for “field conditions including rain, mud, and routine cleaning” rather than vague “normal wear” language.
Read the fine print. Many warranties require professional installation and documented maintenance. Save your receipts and photograph decals immediately after application. Some manufacturers offer “season insurance”—for 15% extra, they’ll replace any failed decals within one calendar year, no questions asked.
Bulk Purchasing Strategies for Teams
Ordering for an entire program? Negotiate “tier pricing” but also request samples for testing. A smart approach is ordering 10% extra decals for mid-season replacements of damaged units, but specifying that extras be from the same production batch to ensure color match.
Consider “split shipments” for large orders. Have half delivered pre-season and the other half mid-season. This ensures fresher adhesive for replacements and reduces storage degradation. Some suppliers offer “decal management programs” where they store your design and produce on-demand, ensuring you always receive recently-manufactured product with maximum shelf life.
Environmental Impact and Sustainable Options
Durability and sustainability aren’t mutually exclusive. 2026’s market includes eco-conscious options that don’t compromise weather resistance.
Biodegradable Backing Papers and Eco-Adhesives
Traditional decal backing paper is silicone-coated and non-recyclable. New plant-based release liners decompose in commercial composting facilities. The adhesive itself is transitioning to bio-based acrylics derived from corn starch rather than petroleum.
These eco-adhesives actually perform better in wet conditions. Their molecular structure includes natural hydrophobic compounds that repel water inherently. The trade-off is a shorter shelf life—use them within six months of purchase rather than the two-year window for conventional adhesives.
Recycling Programs for Old Decals
Removing old decals creates waste. Forward-thinking manufacturers now offer “take-back” programs where you return failed decals for material recovery. The polyurethane face film can be reprocessed into underpadding for artificial turf fields, creating a closed-loop system.
Some programs partner with equipment recycling initiatives. When you retire a helmet, the decals are removed and processed separately from the shell. Ask suppliers about their end-of-life programs; some offer credit toward future purchases for returned material.
Carbon-Neutral Manufacturing Processes
The production of weatherproof decals is energy-intensive. Leading suppliers are offsetting this through renewable energy credits and carbon capture investments. While this doesn’t directly impact performance, it aligns with athletic departments’ sustainability goals.
Look for “cradle-to-gate” carbon labeling that quantifies emissions from raw material extraction through manufacturing. The best suppliers have achieved 40% reductions through process optimization and are targeting carbon neutrality by 2027.
Troubleshooting and Problem Resolution
Even with perfect materials and application, failures happen. Knowing how to diagnose and address issues quickly can save a decal—and a season.
Diagnosing Edge Lift and Peeling
Edge lift follows patterns. Lift starting at ventilation holes indicates inadequate edge seal. Lift along the helmet’s lateral edges suggests flex stress from impacts. Uniform lift around the entire perimeter points to surface contamination during application.
For minor lift, clean under the lifted edge with isopropyl alcohol, apply a needle-thin line of edge-seal adhesive, and press firmly for 60 seconds. Cover with painter’s tape for 24 hours to maintain pressure. If lift exceeds 1/4 inch, replacement is usually necessary—the adhesive has lost its “wet out” ability.
Addressing Bubbling and Moisture Trapping
Bubbles appearing after rain indicate water infiltration. Small bubbles (under 1/8 inch) can sometimes be dried out. Pierce the bubble’s center with a fine needle, press gently to expel moisture, then apply heat from a hair dryer on low setting for 2-3 minutes to evaporate remaining water. Seal the pinhole with clear nail polish or edge-seal adhesive.
Large bubbles or clusters mean the adhesive has failed over a wide area. Attempting repairs is futile; water will continue to wick underneath. Document the failure with photos and contact your supplier—this often indicates a manufacturing defect or adhesive batch issue.
When to Repair vs. Replace
The 50% rule applies: if more than half the decal shows failure signs, replace it. Patchwork repairs create a Frankenstein appearance and usually fail quickly. For single-point damage—a tear from a facemask impact, for example—a patch can work if it’s smaller than a dime and located away from edges.
Always keep a “repair kit” with your equipment: edge-seal adhesive, fine needles, clear sealant, and a small squeegee. Addressing issues within 24 hours of detection prevents cascade failures where one small lift takes the entire decal with it.
Future-Forward Technologies on the 2026 Horizon
The next wave of innovation promises to make current weatherproofing look primitive. These technologies are transitioning from prototype to production.
Smart Decals: Integration of Tracking Tech
RFID tags embedded in decals allow equipment managers to track helmet assignments, maintenance schedules, and impact history. The tags are completely encapsulated in waterproof polyurethane, with read ranges up to 15 feet. For weatherproofing, this means decals are now multi-functional, justifying their cost beyond aesthetics.
NFC chips enable fan interaction—tap a phone to a helmet decal to access player stats. The challenge is ensuring the metal antenna doesn’t create a rigid spot that cracks. 2026’s solution uses printed silver ink antennas that flex with the decal, maintaining weather seal integrity.
Self-Healing Polymers: Science Fiction Becomes Reality
Microcapsule technology embeds healing agents within the decal material. When a crack forms, the capsules rupture and release a polymer that flows into the damage and hardens upon UV exposure. In testing, these decals recover 85% of their original tensile strength after being cut.
The limitation is healing cycles—current materials manage 5-7 healing events before the supply is exhausted. For lacrosse, where damage is cumulative rather than catastrophic, this extends decal life significantly. By season’s end, a self-healing decal might show dozens of micro-repairs that prevented major failures.
Color-Changing Indicators for Impact or Wear
Thermochromic inks that change color with temperature are being adapted for impact indication. A decal that develops a visible mark after a severe hit provides immediate feedback for concussion protocol. For weatherproofing, these inks are encapsulated to prevent moisture interference.
Photochromic decals that darken in sunlight are solving the “mud visibility” problem—darkening when dirty to maintain contrast. The technology uses the same UV-reactive compounds as transition lenses, sealed beneath waterproof topcoats.
Professional vs. DIY: Making the Installation Decision
Your skill level and available time dictate whether professional installation is worth the investment. Both approaches can yield weatherproof results if executed correctly.
Essential Toolkits for Home Application
A proper DIY setup includes: a squeegee with felt edge, surface prep solution, lint-free cloths, a pin vial for bubble release, a heat gun with variable control, and a cutting mat with precision knife. The total investment is under $100—paid for after installing decals on just 5-6 helmets.
The technique is everything. Apply decals using the “hinge method”—taping the decal along one edge, removing half the backing, applying that section, then flipping and completing the other half. This prevents the decal from touching the helmet prematurely and trapping air.
Team Dealer Networks and Certified Installers
Most major manufacturers certify installers through training programs. These pros understand the nuances of each helmet model and have access to application templates that ensure perfect alignment. For a team order, they often charge $5-8 per helmet—a bargain for guaranteed results.
Professional installers also carry liability insurance. If a decal failure leads to a safety issue or NOCSAE compliance problem, you’re covered. They maintain climate-controlled facilities and can handle large orders efficiently, freeing your staff for other tasks.
Cost-Benefit of Professional Services
For programs with 30+ helmets, professional installation typically costs $150-240. Compare this to staff time: a novice might spend 20 minutes per helmet (10 hours total) with a 20% failure rate requiring re-dos. At $25/hour, that’s $250 in labor plus the cost of wasted decals.
The break-even point is around 15 helmets. Below that, DIY makes economic sense if you have capable staff. Above it, professional installation delivers better results at lower total cost. Plus, most pros offer a warranty on their work—something you can’t provide internally.
Climate-Specific Adaptations
One-size-fits-all weatherproofing doesn’t exist. Your region’s specific challenges should guide material and design choices.
High-Humidity Region Modifications
In the Southeast and Mid-Atlantic, humidity is constant. Opt for adhesives with “high-moisture vapor transmission rates” (MVTR)—they allow microscopic moisture to escape without letting liquid water in. Think Gore-Tex for decals.
Designs should minimize solid coverage. Use negative space and outline styles that allow the helmet to “breathe.” Storage becomes critical: dehumidified equipment rooms are non-negotiable. Consider anti-fungal additives in decal topcoats to prevent mildew growth under the film.
Cold-Weather Flexibility Requirements
Northern programs face sub-zero game temperatures that turn standard decals brittle. Specify “cold-crack rated” materials tested to -20°F. These use plasticizers that remain active at low temperatures, maintaining flexibility.
Application temperature matters enormously. Never apply decals in unheated spaces when it’s below 50°F outside. The adhesive won’t “wet out” properly, creating permanent weak spots. If you must apply in winter, warm the helmet shell to 70°F with a heat gun before and after application, then allow 72 hours of indoor curing.
Desert and High-UV Exposure Solutions
Southwest programs battle UV degradation that makes decals brittle and faded. Specify materials with “UVA/UVB blockers” rated for 5+ years of Arizona sun. These contain hindered amine light stabilizers (HALS) that scavenge free radicals before they break down the polymer.
Color selection impacts longevity. Dark colors absorb more heat, accelerating adhesive degradation. In high-UV environments, choose lighter colors or specify UV-reflective pigments. Some programs are switching to reflective metallic finishes that, while banned by some leagues for game use, are perfect for practice helmets that see the most sun exposure.
Frequently Asked Questions
How long should weatherproof lacrosse helmet decals realistically last in rainy, muddy conditions?
With proper application and maintenance, premium weatherproof decals should maintain integrity for a full 12-month season, including playoffs. Elite-level materials can extend to 18-24 months, but plan for replacement annually to ensure optimal appearance and adhesion. The key variables are cleaning frequency, field conditions, and whether helmets are stored properly between games.
Can I apply weatherproof decals over existing decals or should I always start with a clean helmet?
Never layer decals. The underlying decal’s edges create a topography that prevents the new decal from sealing properly, virtually guaranteeing water infiltration. Always remove old decals completely using a heat gun and adhesive remover, then clean the surface thoroughly before application. The 30 minutes spent on proper removal saves hours of mid-season repairs.
What’s the best way to clean mud off helmet decals without damaging them?
Let mud dry completely, then brush it off with a soft, dry brush. Follow with a low-pressure rinse (garden hose, not pressure washer) and a pH-neutral cleaner applied with a microfiber cloth. Always wipe from the decal’s center outward, never across edges. Avoid scrubbing; let the cleaner do the work. Finish with a clean water rinse and air dry—never use heat to speed drying.
Do weatherproof decals affect helmet safety or NOCSAE certification?
Decals themselves don’t compromise helmet structure, but improper application can. Decals thicker than 10 mils in flex zones or those that cover certification labels violate NOCSAE standards. Always check your helmet manufacturer’s decal map and use materials specifically rated for sports equipment. When in doubt, consult your helmet brand’s equipment specialist before ordering custom graphics.
Why do my decals fail at the edges first, and how can I prevent this?
Edge lift is the most common failure mode because edges experience the highest stress and provide water entry points. Prevent it by ensuring meticulous surface prep, applying edge-seal adhesive around the perimeter, and avoiding designs with sharp points or intricate edge details. Post-application, avoid picking at edges and clean carefully, brushing away from rather than toward the decal’s border.
Are metallic or chrome decals less weatherproof than standard colors?
Historically, yes—metallic flakes disrupted the topcoat’s continuity. However, 2026’s “encapsulated metallic” technology seals metal particles in a clear polymer, maintaining weatherproofing. That said, many leagues ban reflective metallic finishes for game use. For practice helmets, they’re fine, but verify compliance before ordering for competition.
How do temperature and humidity during application really impact long-term durability?
Application conditions are critical because adhesives need to “wet out” and conform to the helmet’s surface texture. In cold or humid conditions, this process is incomplete, creating micro-voids that become water channels. A decal applied at 40°F and 80% humidity might look fine initially but will fail within weeks. The adhesive never properly bonded at the molecular level.
Can I repair a decal that’s started peeling, or is replacement the only option?
Minor edge lift (under 1/8 inch) can be repaired by cleaning underneath, applying edge-seal adhesive, and clamping for 24 hours. However, this is a temporary fix. Once adhesive fails over a large area, the decal’s weatherproofing is compromised and replacement is inevitable. Think of repairs as emergency measures to finish a game weekend, not long-term solutions.
What’s the difference between “waterproof” and “weatherproof” in decal marketing?
“Waterproof” means the decal material itself won’t absorb water. “Weatherproof” indicates the entire system—material, adhesive, and design—survives UV, temperature cycling, humidity, and abrasion. Always look for “weatherproof” ratings that include specific test data: ASTM D2247 for humidity resistance, ASTM G154 for UV exposure, and ASTM D4060 for abrasion resistance.
Are there eco-friendly weatherproof decal options that actually perform as well as traditional materials?
Yes, 2026’s bio-based polyurethanes match petroleum-based performance in all weather tests. They use castor oil-derived polymers and plant-based plasticizers that are inherently hydrophobic. The trade-off is shorter shelf life (6 months vs. 2 years) and 10-15% higher cost. For programs prioritizing sustainability, the performance is there, but order only what you need and apply promptly.