Whether you’re transforming a backyard driveway into a neighborhood hoops destination or refreshing the lines on a community court, the difference between a professional-looking finish and a disappointing result often comes down to one critical factor: the quality of your marking system. Basketball court marking kits equipped with precision stencils have revolutionized what was once a frustrating, freehand guessing game into a straightforward DIY project that delivers crisp, regulation-compliant lines every single time. But not all kits are created equal, and understanding the nuances of stencil materials, paint technologies, and application techniques can mean the difference between lines that last for years and those that fade before the season ends.
This comprehensive guide dives deep into everything you need to know about selecting and using basketball court marking kits effectively. We’ll explore the engineering behind durable stencils, decode the complexities of court dimensions across different leagues, and walk you through pro-level application strategies that prevent common pitfalls like paint bleeding and misalignment. By the end, you’ll have the expertise to evaluate any kit on the market and execute a court marking project that looks like it was done by seasoned professionals—without the premium price tag.
Top 10 Basketball Court Marking Kits
Detailed Product Reviews
1. Spalding Basketball Court Marking Kit
Overview: The Spalding Basketball Court Marking Kit offers a budget-friendly, temporary solution for driveway basketball enthusiasts. This basic kit uses colored chalk to create essential court boundaries including the lane, free throw line, and three-point arc. Designed specifically for outdoor residential play, it provides a quick way to visualize regulation markings without permanent commitment.
What Makes It Stand Out: This kit’s primary differentiator is its simplicity and impermanence. The three-piece chalk set in red, white, and blue allows for creative color-coding of different court zones. The included cord with colored rings helps maintain proper measurements and curvature. Unlike paint-based systems, it washes away with water, making it ideal for renters or those wanting seasonal court markings.
Value for Money: At $11.66, this is exceptionally affordable—less than a fast-food meal for two. It eliminates the need for expensive paint, sprayers, or durable stencils. For families testing their interest in basketball or hosting weekend tournaments, the low investment risk is unbeatable. The “Multiple Uses” feature means you can reapply throughout the season.
Strengths and Weaknesses: Strengths include ultra-low cost, zero permanent alteration to property, child-safe materials, and no drying time required. Setup takes minutes with minimal tools. However, significant weaknesses exist: chalk washes away in rain or heavy dew, requires frequent reapplication, lacks precision for serious training, and won’t withstand vigorous play. The markings are also less visible than painted lines and offer no texture difference.
Bottom Line: Perfect for casual players and families wanting temporary, low-commitment court markings. Skip this if you seek durable, regulation-quality lines for consistent practice.
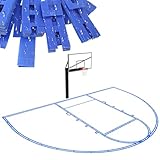
2. Basketball Court Marking Kit Basketball Court Stencil Kit for Concrete Driveway to Paint Basketball Court Lines Half Court High School Regulation Size 39.6’ x 21’

Overview: This half-court stencil kit delivers regulation-sized markings for serious home basketball setups. Measuring 39.6 feet wide by 21 feet long, it includes stencils for the three-point arc, free throw line, and key. Designed for concrete driveways, it uses high-density cardboard stencils to create professional-quality painted lines for high school regulation play.
What Makes It Stand Out: The continuously connected stencil design sets this apart from puzzle-piece competitors, enabling sub-5-minute setup. The high-density cardboard resists immediate saturation, while the included spray guard prevents paint overspray. The accessory package—plumb bob and masking tape valued at $30—provides everything needed except paint. This streamlined system prioritizes speed and simplicity.
Value for Money: Priced at $70.99, this kit offers solid middle-ground value. It undercuts premium plastic alternatives while delivering similar regulation dimensions. The reusable cardboard, when properly dried and stored, provides multiple applications. The included alignment tools eliminate separate purchases, making the total investment reasonable for dedicated players wanting authentic court markings.
Strengths and Weaknesses: Strengths include rapid deployment, accurate regulation sizing, overspray prevention, and comprehensive accessories. The continuous design minimizes alignment errors. However, cardboard remains vulnerable to moisture—wet conditions can cause warping or deterioration. The “doesn’t get soggy” claim requires careful drying between uses. Paint costs add $20-40 more. Storage demands flat, dry space to prevent deformation.
Bottom Line: An excellent choice for budget-conscious players seeking authentic half-court markings. Ideal if you can ensure dry storage and don’t mind the extra paint expense.
3. Murray Sporting Goods Basketball Court Marking Stencil Kit for Driveway, Asphalt or Concrete | Court Marking Stencil Spray Paint Kit for Backyard Basketball Court (2.0)

Overview: Murray Sporting Goods offers a premium USA-made stencil kit engineered for precision and repeatability. This system creates a 12-foot wide free throw lane, 15-foot free throw line, and 19'9" high school regulation three-point arc. The “2.0” designation reflects its innovative puzzle-like connector system, designed for both half-court and full-court configurations across driveways, asphalt, or concrete surfaces.
What Makes It Stand Out: The patent-pending self-aligning connector pieces represent genuine innovation, ensuring perfect alignment without guesswork. The 6-inch wide cardboard pieces provide stability during spraying, while the unique back-of-the-rim alignment tool guarantees precise basket positioning. Proudly manufactured in America, this kit emphasizes quality craftsmanship and includes a comprehensive accessory bundle for professional results.
Value for Money: At $109.99, this is the premium option in the category. The price reflects American manufacturing, innovative engineering, and superior accessories. For serious players, coaches, or facilities planning multiple installations, the reusable design and precision features justify the cost. The time saved through self-alignment and the professional results add long-term value that cheaper alternatives cannot match.
Strengths and Weaknesses: Strengths include the revolutionary alignment system, robust 6-inch cardboard width, comprehensive toolset (plumb bob, spray guard, alignment tool), and versatile full-court capability. The Made in USA quality ensures durability. Weaknesses center on the premium price point and cardboard’s inherent moisture sensitivity despite quality materials. The total process takes 45-60 minutes including drying—longer than some competitors claim. Requires careful storage to maximize reuse.
Bottom Line: The top choice for perfectionists and frequent users who value precision engineering and American-made quality. Worth the premium if budget allows and storage conditions are dry.
4. Reusable Basketball Court Marking Kit, Basketball Court Stencil Kit for Concrete, NOT Paper Board, Sun-Resistant, Upgrade PC Material with Install Instruction

Overview: This kit revolutionizes court marking with upgraded 0.07-inch thick polycarbonate plastic construction, abandoning traditional cardboard entirely. Engineered for longevity, it withstands over 100 uses while resisting water, UV rays, and wind damage. The 6.6-pound system includes five labeled puzzle-style templates (A-E), creating a complete solution for permanent, semi-permanent, or repeated applications on concrete, asphalt, wood, or ceramic surfaces.
What Makes It Stand Out: The waterproof, sun-resistant PC plastic material fundamentally solves the cardboard degradation problem. Unlike disposable alternatives, this kit maintains structural integrity through rain, humidity, and intense sun. The puzzle-style connection points with lettered templates simplify assembly, while the painted board and touch-up board ensure crisp, professional lines. At 0.07-inch thickness, it balances durability with manageable weight and storage.
Value for Money: Priced at $94.47, this kit commands a premium over cardboard but delivers exceptional long-term value. Dividing cost across 100+ uses reduces per-application expense below $1. For community centers, schools, or active families planning repeated installations, the durability eliminates replacement costs. The lightweight design saves storage space compared to thicker alternatives, adding practical value.
Strengths and Weaknesses: Strengths include unmatched weather resistance, extreme reusability, lightweight portability, multi-surface compatibility, and comprehensive accessories including two plumb bobs. The instruction manual ensures error-free setup. The touch-up board creates seamless lines. The only meaningful weakness is the higher initial investment versus cardboard. Some users may find plastic slightly less flexible on uneven surfaces. Paint and painter’s tape must be purchased separately despite the kit’s completeness.
Bottom Line: The ultimate solution for anyone prioritizing durability and repeated use. Pay more now to save significantly later—highly recommended for frequent installers or harsh climates.
5. Coivy Quick Setup Backyard Basketball Court Marking Kit – Snap-Fit Stencils for Concrete,Asphalt,Residential Driveway,with Reusable & Easy Storage Cardboard (for High School)-Paint not Included

Overview: Coivy’s marking kit targets families and community groups with its emphasis on collaborative assembly and smart storage. Designed for high school regulation play, it creates accurate 12-foot lanes, 15-foot free throw lines, and 19'9" three-point arcs. The corrugated cardboard stencils feature a self-aligning snap-fit design that simplifies installation while maintaining professional line quality across concrete, asphalt, tile, or wood surfaces.
What Makes It Stand Out: The protective storage box distinguishes this kit from cardboard competitors, preventing moisture and pressure damage between uses. The guided stickers and clear instructions enable 30-minute team assembly, turning court creation into a family activity. The continuously connected design ensures smooth, professional lines without puzzle-piece gaps. Coivy’s 24-hour customer service promise provides unusual post-purchase support for this category.
Value for Money: At $70.99, this kit matches the price of basic cardboard competitors while adding superior storage and alignment features. The protective box alone extends usable lifespan significantly, delivering better ROI. For families who lack ideal storage conditions, this design prevents warping that ruins cheaper kits. The included spray guard, plumb bob, and tape complete the package, eliminating hidden costs.
Strengths and Weaknesses: Strengths include innovative storage solution, self-aligning design, family-friendly assembly process, comprehensive accessories, and responsive customer service. The kit works across multiple surface types and maintains reusability with proper care. Weaknesses remain inherent to cardboard—prolonged moisture exposure can still cause damage despite storage improvements. The 30-minute setup claim requires ideal conditions and experienced users. Paint costs remain separate, and cardboard thickness isn’t specified.
Bottom Line: An excellent family-oriented choice that solves cardboard storage problems. Perfect for collaborative installation and those wanting organized, repeatable use without plastic kit pricing.
6. Basketball Court Marking Kit, Quick Setup & Portable Basketball Court Stencil, Eco-Friendly & Reusable Basketball Lines, Durable & Accurate Basketball Court Stencil Kit, Mini Kit for Outdoor Use

Overview: This chalk-based marking kit offers an ultra-portable solution for creating temporary basketball courts anywhere outdoors. At just $15.99, it includes a 7.2-meter soft steel rope, eight chalks, two dust-free holders, and a line marker fixer—everything needed to layout basic court boundaries without permanent paint. Designed for driveways, parks, or temporary tournament setups, this system prioritizes environmental friendliness and convenience over permanence.
What Makes It Stand Out: The eco-friendly chalk system is genuinely unique among court marking solutions. Unlike plastic stencils requiring spray paint, this kit creates removable lines that simply wash away with water, making it ideal for shared spaces or rental properties. The soft steel rope ensures straight, accurate lines, while the complete portability means you can create a regulation-style court in minutes and pack it away just as fast. It’s the only solution that leaves zero permanent impact on surfaces.
Value for Money: Exceptional value for casual players and families. At under $16, it costs a fraction of permanent stencil kits while delivering surprising accuracy. The reusable components—particularly the durable steel rope and chalk holders—provide multiple uses. However, ongoing chalk replacement adds minimal long-term cost. Perfect for those wanting court lines without the $70+ investment in plastic stencils or commitment to permanent markings.
Strengths and Weaknesses: Strengths: Extremely affordable; truly eco-friendly with zero chemical runoff; highly portable for on-the-go setup; simple learning curve; no surface damage; washable and reusable system. Weaknesses: Chalk lines are temporary and wash away in rain; requires reapplication for each use; limited to 7.2 meters, restricting full court layouts; chalk dust can be messy; not suitable for high-traffic permanent courts.
Bottom Line: Ideal for families, casual players, and temporary events where permanence isn’t desired. While it won’t replace painted courts for serious athletes, it delivers remarkable functionality at an unbeatable price point. Choose this for flexibility and environmental consciousness, not for permanent installation.
7. STENCILIT Basketball Court Stencil Kit for Concrete - Heavy Duty Plastic, Professional Kit for Driveway & Concrete, Reusable, Easy Assembly, Key & 3Point Lines Basketball Stencil

Overview: The STENCILIT kit represents the premium tier of permanent court marking solutions at $119.90. Constructed from 1mm thick PPE plastic, this professional-grade system creates crisp, accurate regulation markings on concrete driveways and courts. The color-coded, three-part design enables rapid deployment, while the weatherproof material ensures longevity through seasons of use. This is a serious investment for serious players seeking authentic court aesthetics.
What Makes It Stand Out: Professional-level precision sets this apart. The 1mm thickness provides exceptional durability, resisting warping and tearing where thinner stencils fail. The innovative box-doubling-as-spray-guard demonstrates thoughtful engineering, minimizing overspray for cleaner lines. Having been trusted since 2013, STENCILIT’s design expertise shows in every detail—from the rapid alignment system to the comprehensive video instructions that eliminate guesswork for first-time users.
Value for Money: While the highest-priced option reviewed, it justifies the premium through exceptional durability and professional results. Comparable to hiring contractors for $300-500, this kit pays for itself after two uses. The weatherproof construction ensures 50+ applications, amortizing the cost to under $2.40 per use. For schools, parks, or dedicated home courts, it’s a cost-effective path to professional-grade markings that cheaper alternatives simply cannot replicate.
Strengths and Weaknesses: Strengths: Professional-grade 1mm PPE plastic; weatherproof and UV-resistant; color-coded rapid assembly; box converts to spray guard; trusted brand with 10+ year track record; creates true regulation markings; comprehensive instruction support. Weaknesses: Premium price point may exceed casual user budgets; requires spray paint (not included); best suited for permanent installations; heavier than chalk systems; overkill for temporary or trial setups.
Bottom Line: The gold standard for permanent home courts. If you demand professional aesthetics, durability, and precision, this justifies every penny. For casual players, consider cheaper options. For dedicated athletes and facilities, this is the definitive choice that delivers authentic court markings built to last years.
8. 𝑼𝒑𝒈𝒓𝒂𝒅𝒆 Basketball Court Marking Kit, Heavy-Duty Basketball Court Stencil Kit for Concrete or Driveway, Waterproof | Easy Install Plastic Templates, Over 100 Times, Fits Any Surface
Overview: This heavy-duty kit positions itself as the durability champion at $89.99, featuring 0.08-inch thick PC plastic engineered for over 100 uses. The waterproof, non-slip textured material prevents shifting during painting, ensuring precise lines on any surface. With an integrated plumb bob positioning system eliminating measuring tapes, this kit targets frequent users wanting professional results without the STENCILIT premium. It includes five pre-marked templates, paint board, repair board, and all necessary accessories.
What Makes It Stand Out: The plumb bob positioning system is a game-changer, guaranteeing perfect alignment without complex measurements. The 0.08-inch PC plastic thickness strikes an optimal balance—substantially more durable than standard kits while remaining manageable. The non-slip texture is a thoughtful touch preventing frustrating mid-application shifting. Supporting both spray paint and rollers adds versatility, while the 100+ reuse rating suggests exceptional longevity for schools, communities, or serious home court enthusiasts.
Value for Money: Outstanding mid-premium value. At $90, it undercuts the STENCILIT kit by $30 while offering superior reuse capacity (100+ vs. 50+ uses). This amortizes to under $0.90 per application—exceptional for the quality delivered. The included repair board extends lifespan further, while the plumb bob system saves time and reduces error-related waste. For frequent court marking, this offers better long-term economics than cheaper 20-use alternatives.
Strengths and Weaknesses: Strengths: Exceptional 100+ reuse durability; innovative plumb bob alignment; thick 0.08-inch PC plastic; waterproof and non-slip; supports spray/roller application; includes repair board; foldable flat storage; works on any surface. Weaknesses: Higher initial investment than basic kits; plastic material still requires careful storage to prevent warping; no paint included; may be excessive for one-time users; slightly heavier than thinner alternatives.
Bottom Line: The smart choice for frequent users prioritizing durability and precision. It bridges the gap between budget and premium kits, offering professional features without the top-tier price. Community centers, schools, and dedicated home court owners will appreciate the longevity and alignment system. For occasional use, cheaper options suffice.
9. Reusable Waterproof Basketball Court Stencil Kit for Concrete, Basketball Court Marking Kit, Plastic Material, Sun-Resistant NOT Paper Board, Durable,Reusable, Can be Used More Than 20 Times

Overview: This mid-range plastic stencil kit at $89.99 delivers reliable performance with 0.07-inch thick PC plastic construction. Explicitly designed as a superior alternative to paperboard stencils, it offers waterproof and sun-resistant properties for outdoor durability. The puzzle-style connection system simplifies assembly, while the lightweight 6.6-pound design enhances portability. With 20+ reuse capacity, it targets regular home users wanting a balance between durability and affordability.
What Makes It Stand Out: The puzzle-style connection points create an enjoyable, intuitive assembly experience that reduces setup frustration. Weighing only 6.6 pounds, it’s notably lighter than heavy-duty alternatives, making it practical for users who need to store the kit between uses. The 19.9 x 25-foot dimensions accommodate full court markings, while the upgraded plastic hollow board construction specifically addresses the warping and moisture issues that plague paperboard competitors.
Value for Money: Competitively priced at $90, it matches Product 8’s price but with different trade-offs. The 20+ reuse rating is modest compared to premium alternatives but sufficient for most homeowners marking a court annually. The included touch-up board and painted board add value by ensuring clean lines and gap correction. For users prioritizing lightweight portability over maximum durability, this offers reasonable value, though frequent users should consider the 100-use alternative.
Strengths and Weaknesses: Strengths: Lightweight and portable at 6.6 lbs; waterproof and sun-resistant PC plastic; puzzle-style assembly is user-friendly; includes touch-up board for clean lines; works on multiple surfaces; 20+ uses for regular homeowners; comprehensive kit with all accessories. Weaknesses: Only 20+ uses vs. competitors’ 100+; 0.07-inch thickness is thinner than premium options; plastic hollow board may be less rigid; same price as more durable alternatives; no unique alignment system.
Bottom Line: A solid, dependable choice for typical homeowners creating a permanent court. The lightweight design and puzzle assembly make it accessible for DIYers, while the plastic construction ensures it outlasts paperboard alternatives. If you plan to mark one court and store it, this works perfectly. For heavy community use or frequent re-marking, invest in the more durable 100-use kit instead.
10. Reusable Basketball Court Marking Kit Foldable Design Basketball Court Stencil Kit for Concrete, Asphalt, Tiles, Driveway or Backyard - No Paint Included

Overview: This budget-conscious kit at $69.99 uses corrugated cardboard to deliver regulation-sized markings at an accessible price point. The foldable design with 12 clearly labeled components promises under-30-minute assembly, making it ideal for first-time users. With a 12-foot free throw lane, 15-foot free throw line, and 19'9" three-point arc, it provides accurate dimensions for serious practice. The multi-surface compatibility covers concrete, asphalt, wood, and tile applications.
What Makes It Stand Out: The regulation-accurate measurements at this price point are impressive, offering authentic court geometry that cheaper kits often compromise. The 12-component foldable design prioritizes storage convenience, addressing a common pain point with bulky plastic stencils. Clear labeling eliminates confusion during assembly, while the multi-surface versatility means one kit works for driveways, backyard courts, or even indoor gym spaces—uncommon flexibility at this price tier.
Value for Money: Excellent entry-level value. At $70, it’s $20 cheaper than basic plastic alternatives while delivering regulation accuracy. The corrugated cardboard construction keeps costs low, though it sacrifices longevity. For users wanting to test a court layout before committing to permanent paint, or for occasional seasonal use, this provides professional dimensions without the financial commitment. However, replacement costs add up if used more than 5-10 times.
Strengths and Weaknesses: Strengths: Most affordable plastic/cardboard hybrid; authentic regulation markings; sub-30-minute assembly; foldable for compact storage; works on diverse surfaces; clearly labeled components; lightweight and maneuverable. Weaknesses: Cardboard durability is limited; vulnerable to moisture and warping; not truly reusable long-term; no paint included; requires careful handling to prevent damage; unsuitable for wet conditions or high-traffic areas.
Bottom Line: Perfect for budget-conscious buyers wanting regulation-accurate lines without permanence. It’s an excellent trial kit before investing in plastic stencils, or for seasonal use in dry climates. Serious players should upgrade to plastic for durability, but for occasional practice sessions and cost savings, this delivers surprising quality. Treat it gently, keep it dry, and it will serve its purpose admirably.
Why Precision Matters: The Impact of Accurate Court Markings
Safety and Gameplay Integrity
Court lines do more than define boundaries—they create a predictable playing environment that prevents injuries and disputes. A free throw line that’s two inches off can disrupt shooting mechanics developed through thousands of practice reps. A three-point arc that fades mid-court leads to contested calls and potential collisions. Precision markings ensure players develop muscle memory against consistent visuals, reducing the mental load during fast-paced gameplay and preventing awkward pivots near boundaries that cause ankle rolls and knee injuries.
Regulatory Compliance Across Leagues
Every competitive league from youth organizations to the NCAA maintains strict dimensional tolerances. High school courts must adhere to NFHS standards, while recreational facilities hosting multiple age groups often need adjustable markings. Using stencils that guarantee measurements within official tolerances means your court can host sanctioned games without costly re-marking. This is particularly critical for schools and community centers seeking insurance coverage and league certification.
Anatomy of a Basketball Court Marking Kit
Essential Components Every Kit Should Include
A professional-grade kit should contain more than just flat plastic sheets. Look for systems that include alignment tools like corner jigs, spacing gauges, and center-court locators. Quality kits provide reinforcement bars that prevent stencil flexing during application, weighted anchors to secure edges against wind, and detailed layout diagrams with measurement verification checkpoints. The best packages also include paint quantity calculators based on your specific court size and surface porosity.
Understanding Stencil-Based Systems
Stencil kits work by creating a physical barrier between your court surface and the paint, allowing for sharp edge definition. Unlike tape-based methods that risk peeling or leaving adhesive residue, stencils provide consistent line widths and can be repositioned for complex markings like the restricted area arc. Advanced systems use interlocking pieces that maintain proper curvature for free throw circles and three-point lines, eliminating the trigonometry headaches that plague manual measurements.
Types of Marking Stencils: Pros and Cons
Spray Paint Stencils vs. Tape-Based Systems
Spray stencils dominate the market for good reason—they deliver uniform paint distribution and work exceptionally well on textured surfaces like asphalt. They create crisp edges without the learning curve of cutting in with a brush. Tape systems, while cheaper upfront, struggle with adhesion on dusty or slightly damp surfaces and often require touch-ups where paint seeped underneath. For curved lines, spray stencils are non-negotiable; achieving a perfect free throw circle with tape requires surgical precision most DIYers lack.
Material Showdown: Plastic, Cardboard, and Aluminum
Lightweight polypropylene stencils offer the best balance of durability and cost, resisting moisture and maintaining flexibility in temperature swings. Cardboard stencils, often found in budget kits, are single-use options that warp with humidity and tear during removal—saving money initially but costing more in replacement time. Aluminum stencils represent the premium tier, providing decades of reuse and superior stability in windy conditions, though their weight makes them less practical for occasional users.
Full-Court Kits vs. Modular Component Stencils
Full-court systems ship as a complete set with every line pre-measured and ready to lay out, ideal for first-time installers who want foolproof results. Modular kits offer individual stencils for each court element, providing flexibility for courts with non-standard dimensions or multi-sport configurations. If you’re marking a half-court or need to customize for youth leagues, modular systems let you purchase only what you need while allowing incremental upgrades.
Critical Features to Evaluate Before Purchasing
Dimensional Accuracy and Official Specifications
Verify that stencil measurements reference official rulebooks, not approximations. The three-point line should account for the 3-foot radius from the center of the basket, and the free throw lane must measure exactly 12 feet wide for high school and college courts. Quality manufacturers laser-cut their stencils from CAD files directly sourced from NFHS, NCAA, and FIBA documentation, ensuring tolerances within 1/8 inch—critical for courts that will be inspected before tournaments.
Durability and Reusability Metrics
Examine the stencil’s ability to withstand repeated paint applications without buildup. Premium stencils feature non-stick coatings that prevent paint adhesion to the template itself, allowing for 50+ uses. Check for reinforced edges where spray patterns concentrate stress, and look for UV inhibitors that prevent brittleness after summer storage. A stencil that cracks after three uses isn’t a bargain, regardless of price.
Alignment and Registration Mechanisms
The most overlooked feature is how stencils position themselves accurately. Advanced kits include peg holes that align with chalk lines, magnetic corner connectors for perfect 90-degree angles, and transparent sections that let you see underlying reference marks. Some systems use a “tab and slot” design that self-squares the key and free throw line, eliminating the need for constant measurement verification during layout.
Decoding Court Dimensions: From NBA Driveways to FIBA Standards
Professional and Collegiate Regulations
NBA courts span 94x50 feet with a three-point line 23.75 feet from the basket (22 feet in corners), while NCAA courts share the same overall dimensions but use a 20.75-foot three-point arc. Your stencil kit must accommodate these differences if you’re marking a college facility. The restricted area arc radius increased to 4 feet in 2015—using outdated stencils creates compliance issues for official play.
High School and Youth Court Modifications
NFHS standards call for 84x50 feet courts with a 19.75-foot three-point line, but youth leagues often use scaled-down versions. Quality stencil kits include adjustment guides for 74x42 feet middle school courts and even 60x40 feet elementary configurations. These adaptations maintain proper proportions while fitting within smaller driveways or gymnasiums, ensuring young players learn correct spatial relationships.
Driveway and Recreational Court Sizing
Not every space accommodates regulation dimensions. The best marking kits provide proportional scaling calculators that maintain line ratios while fitting your specific slab dimensions. This might mean a 60% scale court that still positions the free throw line at the correct proportional distance, preserving the gameplay experience even when space is limited.
Material Science: What Makes a Stencil Last?
Gauge Thickness and Structural Integrity
Stencil thickness directly impacts edge crispness. Thin stencils (under 1/8 inch) flex during spraying, creating fuzzy lines. Optimal thickness ranges from 3/16 to 1/4 inch—rigid enough to resist paint seepage but light enough for easy handling. Look for reinforced ribs on large stencils like the center court circle; these prevent sagging that causes uneven line weights.
UV Resistance and Weatherproofing
Polypropylene stencils should contain UV stabilizers that prevent degradation from sun exposure. Without them, plastic becomes brittle after one summer in storage, cracking along fold lines. For outdoor storage, choose opaque materials that block light penetration. Aluminum stencils should be powder-coated to prevent oxidation that can transfer to your court surface during application.
Flexibility vs. Rigidity: Finding the Balance
Extreme rigidity causes stencils to fracture if stepped on or dropped, while excessive flexibility leads to paint bleeding. The sweet spot lies in materials with engineered flex zones—stiff across line sections but slightly pliable at connection points. This design allows stencils to conform to minor surface imperfections without compromising edge quality.
Application Mastery: Techniques for Crisp Lines
Spray Painting Protocols for Sharp Edges
Success with spray stencils depends on paint application distance and angle. Hold the can 8-10 inches from the surface, moving parallel to the stencil at a consistent 45-degree angle. Apply multiple light passes rather than one heavy coat—this prevents paint buildup that seeps underneath. For wide lines, overlap spray patterns by 50% to ensure even coverage without creating stripes.
Roller Application Methods
When using rollers with stencils, opt for foam rollers with rounded edges that won’t push paint under the template. Load the roller minimally and use a stippling motion rather than broad strokes. This technique works best for indoor wood surfaces where overspray is problematic. Keep a damp cloth nearby to immediately wipe any paint that contacts the stencil’s top surface before it transfers accidentally.
Preventing Bleed-Through and Overspray
The secret to clean lines lies in edge sealing. Before painting, use a light coat of spray adhesive on the stencil’s underside or weigh down edges with sandbags. For windy conditions, create a temporary windbreak with cardboard sheets. Apply a “seal coat” of clear primer along stencil edges—this fills microscopic gaps between stencil and surface, preventing colored paint from creeping underneath.
Surface Prep: The Foundation of Long-Lasting Lines
Concrete and Asphalt Cleaning Requirements
Paint adhesion fails on dirty surfaces. Power wash concrete at 3000+ PSI to remove oil, moss, and old paint flakes. For asphalt, use a degreasing detergent and stiff-bristle brush to eliminate petroleum residues that rise to the surface in hot weather. Etch smooth concrete with muriatic acid (diluted 10:1) to create tooth for paint bonding—skip this step and your lines may peel within months.
Crack Repair and Leveling Considerations
Fill cracks wider than 1/4 inch with elastomeric concrete filler that flexes with temperature changes. For asphalt, use rubberized crack sealant that prevents moisture intrusion. Level depressions with polymer-modified patching compound; painting over uneven surfaces causes stencil gaps that lead to bleeding and inconsistent line thickness.
Priming Strategies for Different Substrates
Bare concrete requires a concrete primer that seals pores and prevents paint absorption. Asphalt benefits from an asphalt emulsion primer that bonds with petroleum-based surfaces. For previously painted courts, apply a bonding primer only if the existing paint is sound—peeling surfaces need complete removal. Never skip primer on porous surfaces; you’ll use three times as much paint trying to achieve opacity.
Paint Technology: Choosing the Right Coating
Acrylic Latex vs. Chlorinated Rubber
Acrylic latex paints dominate DIY projects for their water cleanup and low odor, offering good color retention for 2-3 years. Chlorinated rubber formulations, used by professionals, create harder, more chemical-resistant lines that withstand power washing and last 5+ years. The trade-off? Rubber-based paints require mineral spirits for cleanup and have higher VOCs. For residential courts, premium acrylics with urethane additives provide the best compromise.
Color Retention and UV Stabilizers
White lines turn yellow or gray without UV inhibitors. Specify paints with titanium dioxide concentrations above 15% and UV absorbers like benzophenone. For colored lines (common in multi-sport courts), demand pigments with automotive-grade lightfastness ratings of 8 or higher. Cheaper paints fade 50% in the first year, requiring complete repainting rather than simple touch-ups.
Coverage Rates and Dry Time Variables
Paint coverage varies wildly by surface porosity. Smooth concrete yields 300 square feet per gallon; weathered asphalt might only cover 150. Calculate needs using the worst-case scenario—running out of paint mid-project creates visible lap marks. Fast-dry formulations tack-free in 30 minutes allow quicker stencil repositioning but have shorter working times, increasing the risk of visible brush marks if you work too slowly.
Budgeting Your Court Marking Project
Kit Price Ranges and What They Include
Entry-level kits ($50-$100) use thin plastic stencils for basic lines only. Mid-range systems ($150-$300) include thicker materials, alignment tools, and sometimes starter paint. Professional-grade kits ($400-$800) feature aluminum components, multi-sport adaptability, and detailed layout software. Factor in that cheaper kits often require purchasing separate stencils for the three-point line and center court circle—hidden costs that quickly escalate.
Paint Quantity Calculations
A regulation high school court requires approximately 4-5 gallons of paint for complete striping, including primer. The three-point line alone consumes nearly a gallon due to its length and width. Use online calculators that account for line width (2 inches standard, 4 inches for NBA) and total linear footage. Always round up—partial gallons can’t be returned, but running out creates color mismatches.
Hidden Costs: Primers, Sealers, and Tools
Beyond the kit and paint, budget for concrete primer ($30/gallon), crack filler ($15/tube), and a quality 3000+ PSI pressure washer rental ($75/day). Professional-grade striping paint guns ($200+) deliver superior results compared to aerosol cans but require practice. Don’t forget personal protective equipment, painter’s tape for taping off adjacent areas, and tarps to protect landscaping from overspray.
DIY Installation vs. Professional Services
Assessing Your Skill Level and Timeline
Marking a court demands meticulous measurement patience. If you struggle with hanging pictures level, professional installation may save frustration. A DIY project takes 2-3 full days: one for surface prep, one for layout and priming, and one for painting. Professionals with laser layout tools can complete the job in 6-8 hours. Consider your timeline—courts need 48-72 hours of dry weather after painting.
When Professional Precision Is Worth the Investment
Complex situations justify professional costs: courts requiring multi-sport overlays, surfaces with significant cracking, or facilities needing guaranteed compliance for insurance purposes. Professionals carry liability insurance and often warranty their work for 2-3 years. The break-even point typically occurs at 1,500+ square feet or when your time is valued above $50/hour.
Hybrid Approaches for Complex Courts
Save money by handling surface prep and priming yourself, then hiring professionals for final layout and striping. This approach cuts costs by 40% while ensuring critical measurements are perfect. Some companies offer “consulting” services where they mark reference points with a laser level, and you handle the painting—ideal for confident DIYers who want professional-grade accuracy.
Maintenance Strategies for Multi-Season Durability
Seasonal Inspection and Touch-Up Schedules
Inspect lines every spring and fall. Touch up high-traffic areas like the free throw line and lane markings annually using leftover paint stored properly. Catch fading early—when lines are 80% intact, a simple recoat suffices. Wait until they’re 50% gone and you’ll need complete stripping and repainting. Keep a small stencil set for quick touch-ups without deploying the full kit.
Protective Sealers and Topcoats
Apply a clear acrylic sealer over fresh paint to add 1-2 years of life. Choose non-yellowing formulations designed for traffic paint. For courts that see winter use, specify sealers with de-icing salt resistance. Reapply sealer every 18-24 months, scuffing the surface lightly with 220-grit paper first. Never seal over dirty or chalking paint—it locks in degradation.
When to Restripe vs. Repaint
Restriping (painting over existing lines) works only when old paint is firmly adhered and not excessively built up. More than three layers of paint creates a lip that traps water and peels. Use a paint thickness gauge—if readings exceed 15 mils, it’s time for complete removal. Chemical strippers work but require neutralization; grinding is faster but creates dust needing HEPA containment.
Troubleshooting Common Marking Mistakes
Alignment Errors and Solutions
The most common mistake is a crooked key or off-center free throw line. Prevent this by establishing a true centerline using the 3-4-5 triangle method before placing any stencils. Snap chalk lines that intersect at exact 90-degree angles, then verify diagonals measure identically. If you discover misalignment after painting, wait for paint to cure completely, then sand the error with 80-grit paper and touch up—never try to wipe wet paint, which smears and worsens the problem.
Edge Bleeding Fixes
Bleeding occurs when paint seeps under stencil edges. If caught while wet, carefully lift the stencil and wipe the bleed with a damp rag. For dried bleed, use a sharp utility knife to score along the intended line edge, then peel away the excess paint. Prevent future issues by applying a light mist coat first—this seals the edge without enough volume to seep underneath, then follow with full coverage coats.
Premature Paint Failure Causes
Peeling within months signals surface contamination or inadequate prep. Chalking (powdery residue) indicates cheap paint without proper binders. Fading suggests insufficient UV protection. Blistering points to moisture trapped beneath the surface. Each failure mode requires specific remediation—there’s no universal fix. Document your process and materials; reputable manufacturers will analyze failures and provide corrective guidance.
Customization and Multi-Sport Adaptations
Adding Center Court Logos and Graphics
Quality stencil kits include blank templates for custom logos. Create designs using vector graphics software, then have them laser-cut from 1/8-inch polypropylene. Apply custom stencils after base lines are down but before sealers. Use multiple colors, applying lightest shades first and working darker. Mask off surrounding areas meticulously—logo mistakes are far more visible than line errors.
Converting for Volleyball, Pickleball, or Tennis
Multi-sport stencils use different colors for each sport’s lines, typically following color hierarchies: white for primary sport (basketball), yellow for secondary (volleyball), and blue for tertiary (pickleball). Ensure paint opacity prevents color bleed-through—apply white base coats under yellow lines on dark surfaces. Space lines to avoid visual confusion; minimum 6-inch separation prevents players from misreading boundaries.
Color Variations for Enhanced Visibility
On light concrete, consider using darker line colors like grey or tan to reduce glare. For courts used by vision-impaired players, high-contrast combinations like black lines on yellow primer improve visibility. Night courts under LED lighting benefit from slightly warmer white paints (off-white vs. bright white) that reduce halo effects around bright lights.
Environmental and Safety Protocols
VOC Regulations and Eco-Friendly Options
Many jurisdictions restrict volatile organic compounds in outdoor paints. Look for kits specifying <100 g/L VOC content. Waterborne acrylics meet most regulations while delivering durability. For eco-conscious projects, specify paints with recycled content or bio-based resins. These formulations cost 20-30% more but support LEED certification for commercial facilities.
Proper Disposal of Paint and Materials
Never wash paint brushes or sprayers into storm drains. Collect wash water in 5-gallon buckets and let solids settle; decant clear water onto dirt (not pavement) and dispose of sludge as hazardous waste. Dried empty paint cans go in regular trash, but partially filled cans require special disposal—most municipalities hold monthly collection events. Keep material safety data sheets for all products used.
Personal Protective Equipment Requirements
At minimum, wear N95 respirators when spraying (not just dust masks), chemical-resistant gloves, and safety glasses with side shields. For power washing, add waterproof boots and hearing protection. When using solvents for cleanup, upgrade to a half-face respirator with organic vapor cartridges. Long-term exposure to paint fumes and concrete dust causes serious respiratory issues—professional-grade PPE is non-negotiable.
Storage and Care: Protecting Your Investment
Post-Use Cleaning Procedures
Clean stencils immediately after use. For water-based paints, rinse with a garden hose and soft brush before paint dries. For solvent-based paints, wipe with appropriate thinner, then wash with soap and water. Never scrape dried paint with metal tools—this gauges the stencil edge and ruins future line quality. For stubborn buildup, soak stencils in a shallow tray of solvent, then pressure wash on low setting.
Optimal Storage Conditions
Store stencils flat in a climate-controlled environment. Hanging them causes warping; stacking heavy objects on top creates permanent bends. Ideal conditions are 60-75°F with <50% humidity. For long-term storage, place sheets of wax paper between stacked stencils to prevent them from sticking together if trace paint remains. Avoid attics and sheds where temperature extremes cause plastic to become brittle.
Expected Lifespan by Material Type
Lightweight plastic stencils last 5-10 uses with proper care; medium-duty polypropylene extends to 20-30 uses. Heavy-duty 1/4-inch materials survive 50+ applications. Aluminum stencils, with proper storage, remain viable indefinitely but require periodic refinishing of their non-stick coating. Cardboard stencils are single-use only, making them suitable for one-time projects but economically foolish for community courts requiring annual touch-ups.
Frequently Asked Questions
How long does it take to mark a full basketball court using stencils? A first-time DIYer should allocate a full weekend: Saturday for surface prep and layout, Sunday for painting. Experienced installers can complete the process in 6-8 hours. Factor in 24-48 hours of cure time before the court is game-ready. Weather delays can extend this—never paint if rain is forecast within 6 hours or temperatures will drop below 50°F within 24 hours.
Can I use regular house paint instead of specialized court paint? Standard exterior latex lacks the abrasion resistance and flexibility required for athletic surfaces. It will crack under foot traffic and fade within months. Court-specific paints contain harder resins and UV stabilizers formulated for concrete and asphalt adhesion. While house paint seems cheaper initially, requiring complete repainting annually makes it more expensive long-term.
What’s the minimum driveway size needed for a usable half-court? A functional half-court requires a minimum of 25x30 feet to accommodate a full free throw lane (19 feet) plus room behind the basket. For a three-point arc, you’ll need 30x35 feet. Anything smaller forces proportional scaling that compromises gameplay realism. Measure carefully before purchasing stencils—many driveways accommodate shooting stations but not actual half-court games.
How do I prevent the stencil from moving while I paint? Use a multi-pronged approach: place sandbags every 12 inches along edges, apply light spray adhesive to the stencil underside, and work in wind-protected conditions. For large stencils, have an assistant hold opposite edges while you paint. Some pros create a plywood “stencil sandwich,” placing weights on a second sheet over the stencil to maintain even pressure without direct contact.
Is it better to spray or roll paint through stencils? Spraying delivers superior edge crispness and works on any surface texture. Rolling is viable only on perfectly smooth indoor floors and risks pushing paint under stencil edges. If you must roll, use minimal paint and a stippling technique. For outdoor courts, spraying is the only method that consistently produces professional results.
How often should court lines be repainted? High-traffic indoor courts need annual touch-ups; outdoor courts typically require complete repainting every 2-3 years. UV exposure, freeze-thaw cycles, and court usage intensity all affect longevity. Inspect lines each spring—when they’re less than 80% intact, schedule repainting. Waiting longer means the surface will need re-priming, doubling material costs.
Can stencils be used on cracked or uneven surfaces? Stencils conform to minor imperfections but fail over significant cracks. Fill cracks wider than 1/4 inch before marking. For alligatoring asphalt (extensive surface cracking), consider resurfacing first—stencils will highlight rather than hide these defects. Flexible stencils work better on uneven surfaces than rigid aluminum ones.
What’s the best time of year to paint court lines? Late spring and early fall offer ideal conditions: temperatures between 60-85°F, moderate humidity, and minimal precipitation. Avoid painting in direct summer sun—the surface can reach 140°F, causing paint to skin over before it adheres properly. Morning applications work best, allowing paint to cure during the day while avoiding dew formation.
How do I remove old paint lines before applying new ones? For minor touch-ups, scuff existing paint with 120-grit sandpaper to promote adhesion. For complete removal, use a floor grinder with diamond pads or chemical stripper followed by pressure washing. Never paint over peeling paint—it will continue to fail. A test patch reveals whether existing paint is sound enough for overcoating.
Are there stencils available for non-standard court sizes? Many manufacturers offer custom scaling services where they adjust official dimensions proportionally to fit your space. Provide exact slab measurements and they’ll generate a stencil set that maintains proper relative distances. This typically costs 20-30% more than standard kits but delivers a court that plays correctly despite size constraints. Avoid manually scaling dimensions yourself—minor errors compound across the court layout.