When you’re logging 30-plus miles before noon and every ounce feels like a pound by mile 50, your shelter system becomes more than just a place to crash—it becomes a critical performance variable. Fastpacking demands a unique alchemy of speed, efficiency, and self-sufficiency that traditional backpacking gear simply can’t deliver. Enter the ultralight tarp tent: a minimalist shelter that strips away everything non-essential while retaining just enough protection to keep you moving fast and sleeping soundly.
But here’s the thing—not all tarp tents are created equal, and what’s perfect for one fastpacker’s style might be a miserable failure for another. The difference between a shelter that feels like a featherweight fortress and one that becomes a soggy, wind-whipped nightmare often comes down to understanding nuanced design principles, material science, and your own skill level. This guide dives deep into the world of ultralight tarp tents specifically through the lens of fastpacking, helping you make an informed decision without the marketing hype.
Top 10 Ultralight Tarp Tents for Fastpackers
Detailed Product Reviews
1. Clostnature Tent Footprint - Waterproof Camping Tarp, Heavy Duty Tent Floor Saver, Ultralight Ground Sheet Mat for Hiking, Backpacking, Hammock, Beach - Storage Bag Included

Overview: The Clostnature Tent Footprint is a lightweight ground sheet measuring 87" x 59" and weighing just 9.8 oz. Constructed from ripstop 190T polyester with a waterproof coating, this tarp serves as essential protection for your tent floor against abrasion and moisture. Designed for 2-person tents, it packs down to cellphone size in its included storage bag.
What Makes It Stand Out: This footprint excels at the fundamentals while maintaining an ultralight profile. Its multi-purpose design extends beyond tent protection to function as a picnic mat, sunshade, or hammock rain fly. The one-year material and workmanship guarantee demonstrates Clostnature’s confidence in their product, a rare assurance in this price category.
Value for Money: At $19.99, this represents exceptional value. Replacing a damaged tent costs significantly more than this preventative measure. While not the most rugged option available, it provides adequate protection for most three-season conditions at a fraction of the cost of premium alternatives, making it ideal for budget-conscious adventurers.
Strengths and Weaknesses: Pros: Extremely lightweight and compact; affordable price point; versatile applications; included storage bag; brand guarantee. Cons: 190T polyester less durable than higher-denier fabrics; limited size may not fit all tent designs; basic waterproof coating compared to premium options.
Bottom Line: The Clostnature Footprint is a smart investment for casual backpackers and campers seeking affordable tent protection without adding significant weight. It delivers core functionality admirably, though serious mountaineers may want heavier-duty options.
2. Wise Owl Outfitters Hammock Rain Fly – Waterproof Camping Tarp Cover with Tent Stakes & Carry Bag, Ultralight Shelter for Backpacking & Outdoor Shade

Overview: The Wise Owl Outfitters Hammock Rain Fly is a comprehensive weather protection system built from ripstop nylon with taped seams and a 3000mm PU coating. Weighing 26 oz, this 10-foot square tarp includes six guy lines, aluminum stakes, and a waterproof carry bag, providing everything needed for immediate deployment in backcountry conditions.
What Makes It Stand Out: This kit’s completeness sets it apart—you won’t need to purchase additional hardware. The taped seams and reinforced construction offer reliable protection against harsh weather, while the ripstop nylon balances durability with packability. Wise Owl’s reputation for quality outdoor gear adds confidence to your purchase.
Value for Money: Priced at $49.91, this represents solid mid-range value. The included accessories (worth $15-20 separately) make the actual tarp cost comparable to budget options, while delivering superior materials and construction. For hammock campers specifically, this tailored solution saves both money and setup time versus piecing together a system.
Strengths and Weaknesses: Pros: Complete all-in-one kit; taped seams prevent leaks; reputable brand; versatile for tents or hammocks; good size for single-person coverage. Cons: Heavier than ultralight alternatives; square shape less efficient for ground footprint use; stakes could be upgraded for hard ground.
Bottom Line: This rain fly excels for hammock campers seeking a hassle-free, reliable shelter system. The included accessories and proven construction justify the moderate price, making it a smart choice for three-season backpackers who prioritize convenience over absolute minimal weight.
3. Onewind Tent Footprint, 4000mm Waterproof Rate PU Coating, 98" *55" Ultralight Camping Tarp Tent Floor Ground Sheet with Carry Bag for Backpacking, Hiking, Camping, Picnic, Ground

Overview: The Onewind Tent Footprint delivers premium protection with a 4000mm waterproof PU coating and silicone backside treatment. Measuring 98" x 55" and weighing only 9.6 oz, this ultralight groundsheet uses 1.1oz 20D ripstop silnylon—material typically reserved for high-end backpacking gear. Multiple attachment points enable versatile configurations beyond basic tent protection.
What Makes It Stand Out: The exceptional 4000mm hydrostatic head rating significantly exceeds standard footprints, offering superior moisture protection in saturated ground conditions. The silnylon construction provides enhanced UV resistance and strength-to-weight ratio compared to conventional polyester. Its dual-coating system demonstrates thoughtful engineering for serious outdoor enthusiasts.
Value for Money: At $27.99, this occupies the sweet spot between budget and premium options. While pricier than basic poly tarps, the silnylon material and higher waterproof rating justify the cost for backpackers facing variable conditions. You’re paying for advanced materials that shave ounces while increasing performance—worthwhile for those counting every gram.
Strengths and Weaknesses: Pros: Outstanding 4000mm waterproof rating; ultralight silnylon construction; superior UV resistance; compact packed size; versatile attachment system. Cons: Higher cost than polyester alternatives; narrower width may limit compatibility; silnylon can be slippery on certain terrain; requires careful handling to avoid punctures.
Bottom Line: The Onewind Footprint is ideal for dedicated backpackers and thru-hikers who demand maximum protection with minimal weight penalty. The premium materials and superior waterproofing make it worth the modest price increase over budget options for those venturing into challenging conditions.
4. Unigear Hammock Rain Fly Waterproof Tent Tarp, 9.8x9.8ft, UV Protection and PU 3000mm Waterproof, Lightweight for Camping, Backpacking and Outdoor Adventure

Overview: The Unigear Hammock Rain Fly offers expansive 9.8x9.8ft coverage in a square configuration, constructed from 210D ripstop Oxford fabric with a 3000mm PU waterproof rating. Weighing slightly more than ultralight options, this tarp includes six stakes and ropes, featuring reinforced triangle dual-layer anchor points designed to prevent tearing under stress.
What Makes It Stand Out: This tarp’s square shape provides exceptional versatility for various pitching configurations—from A-frame shelters to diamond pitches. The reinforced anchor points with double-stitched construction address common failure points in budget tarps. UV protection coating adds functionality as a sunshade, while the included hardware eliminates additional purchases.
Value for Money: At $19.99, this represents remarkable value for the coverage area and features. Comparable square tarps often cost $30-40 without included accessories. The reinforced construction suggests longer service life than typical budget options, translating to better long-term value despite marginally higher weight.
Strengths and Weaknesses: Pros: Generous coverage area; reinforced stress points prevent failures; includes stakes and ropes; UV protection; versatile square design; unbeatable price. Cons: Heavier than dedicated ultralight footprints; 210D fabric adds bulk; square shape less efficient for tent footprint use; hardware quality is basic.
Bottom Line: The Unigear Tarp is perfect for campers wanting maximum versatility on a minimal budget. It functions admirably as a rain fly, sunshade, or emergency shelter, though weight-conscious backpackers might prefer lighter options. For car camping and casual backpacking, it’s an outstanding value.
5. Travel Bird Ultralight Tarp, 14ft Hammock Rain Fly Lightweight Waterproof Camping Tent Tarp with Doors, Bushcraft Tarp Shelter for Backpacking Hiking Camping

Overview: The Travel Bird Ultralight Tarp redefines shelter convenience with its innovative 14x9ft design featuring integrated aluminum alloy support poles and a dual-door system. Weighing 2.1 lbs, this 210T polyester tarp with PU2000 coating includes an extensive accessory kit: six stakes, multiple windproof ropes, and elastic cords. The silver-coated interior provides UV protection while creating a bright, spacious interior.
What Makes It Stand Out: The pole-supported design eliminates complex guy-line configurations, enabling rapid setup without knots—a game-changer for campers prioritizing convenience. The dual-door system offers unprecedented ventilation control and weather protection adaptability. At 14 feet long, it provides exceptional coverage for hammock camping or group shelter needs.
Value for Money: At $65.99, this is a premium investment. However, the innovative pole system and comprehensive accessory kit justify the cost when compared to purchasing a standard tarp plus aftermarket pole setup. The time saved and enhanced livability provide tangible value for frequent campers who value setup efficiency and comfort.
Strengths and Weaknesses: Pros: Innovative pole-supported design; massive coverage area; dual-door ventilation system; complete premium accessory kit; rapid knot-free setup; excellent weather protection. Cons: Heavier than true ultralight tarps; higher price point; packed size larger than minimalist options; pole system adds potential failure points.
Bottom Line: The Travel Bird Tarp suits car campers, basecamp setups, and hammock enthusiasts who prioritize convenience and living space over absolute minimal weight. While not for ounce-counting thru-hikers, its innovative design and comprehensive features make it worth the premium for those valuing quick setup and versatile protection.
6. Azarxis Waterproof Camping Tent Tarp Hammock Rain Fly Footprint Ground Cloth Shelter Sunshade Beach Picnic Blanket Mat for Outdoor Camping Park Lawn (Army Green, 5 x 7 ft)

Overview: The Azarxis Waterproof Camping Tent Tarp is an entry-level ground cloth designed for casual outdoor enthusiasts seeking basic protection without breaking the bank. Measuring 5 x 7 feet in this configuration, it serves as a reliable barrier between your tent and the ground, while offering versatility for picnics, beach outings, or sunshade applications.
What Makes It Stand Out: This tarp distinguishes itself through its 420D Oxford cloth construction with professional waterproof treatment, delivering surprising durability at this price point. The availability of multiple colors and three sizes (including this compact 5x7 option) allows users to match their specific needs. Metal grommet eyelets facilitate easy staking, and the included storage pouch enhances portability for car camping scenarios.
Value for Money: At $12.99, this represents exceptional value for occasional campers and beginners. While ultralight backpackers might seek lighter options, this tarp costs significantly less than premium alternatives while providing adequate protection for fair-weather camping and day-use activities. It effectively extends tent lifespan by preventing ground moisture and abrasion.
Strengths and Weaknesses: Strengths include affordability, durable Oxford cloth material, compact packed size, multiple size options, and versatile functionality. The metal grommets provide secure anchoring points. Weaknesses involve its heavier weight compared to ultralight alternatives, smaller coverage area limiting compatibility with larger tents, and basic waterproofing that may struggle in prolonged heavy rain.
Bottom Line: The Azarxis tarp is an excellent budget-conscious choice for car campers, festival-goers, and casual outdoor enthusiasts. While not suited for serious backpacking or extreme weather, it delivers reliable ground protection and versatility at an unbeatable price point, making it ideal for entry-level adventurers.
7. Ultralight Camping Tarp, Backpacking Tarp, Tyvek Sheet, Tyveks Tent Footprint, Tyveks House Wrap, Tent Flooring, Tyvekes Ground Cloth, Camping Fly, Multiple Sizes

Overview: This Ultralight Camping Tarp leverages Tyvek house wrap technology to create a featherlight ground sheet that serious backpackers crave. Weighing merely 5 ounces, it provides essential protection without adding significant pack weight, making it ideal for long-distance treks where every ounce matters.
What Makes It Stand Out: The proprietary Tyvek material offers a unique combination of waterproof protection and breathability, preventing ground moisture transmission while allowing air circulation to reduce condensation. Its exceptional tear and puncture resistance ensures durability across rocky, uneven terrain. The simple setup requires just spreading it under your tent and staking through integrated grommets.
Value for Money: Priced at $25.57, this tarp occupies a sweet spot between disposable plastic sheets and heavy-duty nylon footprints. For ultralight enthusiasts, the weight savings justify the modest investment, especially considering Tyvek’s durability that outlasts cheaper alternatives. It competes favorably with products costing twice as much while delivering superior packability.
Strengths and Weaknesses: Strengths include remarkable ultralight weight, durable Tyvek construction, breathable waterproofing, easy deployment, and excellent packability. The material resists abrasion and punctures effectively. Weaknesses include a potentially crinkly texture that some find noisy, limited aesthetic appeal, and a price point higher than basic polyethylene tarps. Size options aren’t explicitly detailed, which may concern those needing specific dimensions.
Bottom Line: This Tyvek tarp is a must-have for ultralight backpackers and minimalist campers prioritizing weight savings without sacrificing protection. While casual campers might prefer more conventional materials, serious hikers will appreciate the technical performance and durability that justifies every penny of its mid-range price.
8. onewind 12×10 ft Hammock Tarp, Ultralight Tarp Silnylon Hammock Rain Fly Lightweight Waterproof Camping Tent Tarp with Doors, Easy to Setup with Stuff Sack, Tent Stakes, OD Green

Overview: The onewind 12×10 ft Hammock Tarp is a premium shelter solution engineered for serious hammock campers and four-season adventurers. This expansive silnylon tarp delivers comprehensive weather protection with its innovative door system, transforming from an open fly to an enclosed shelter in challenging conditions.
What Makes It Stand Out: Its massive 12x10-foot coverage area provides exceptional protection, while the 1.1oz 20D ripstop silnylon with 4000mm PU coating offers professional-grade waterproofing. The overlapping door system creates a versatile, fully-enclosed sanctuary during storms that can be folded back in fair weather. Eleven tie-outs and four pull-outs, reinforced with heavy-duty stitching, enable multiple pitch configurations.
Value for Money: At $89.99, this premium tarp includes a complete setup kit: four aluminum stakes, reflective guy lines, line adjusters, carabiners, and a double-ended stuff sack. When factoring the included accessories and four-season capability, the price aligns with comparable high-end tarps while offering superior versatility. It’s an investment for dedicated outdoorspeople rather than occasional campers.
Strengths and Weaknesses: Strengths include outstanding coverage area, robust waterproofing, versatile door system, complete accessory package, four-season durability, and no-knot setup simplicity. The 1.8-pound weight remains reasonable for the size. Weaknesses involve higher cost than basic tarps, weight that may deter ultralight purists, and potential complexity for beginners unfamiliar with tarp pitching.
Bottom Line: The onewind tarp excels for committed hammock campers and backpackers needing maximum weather protection across all seasons. While overkill for fair-weather outings, its robust construction, generous coverage, and adaptability make it worth the premium price for those venturing into unpredictable mountain weather or extended backcountry trips.
9. Frelaxy Tent Footprint, Waterproof Camping Tarp, Durable Tent Floor to Elevate Your Camping, Hiking, Backpacking, Hammock, Beach Experience
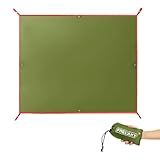
Overview: The Frelaxy Tent Footprint strikes an impressive balance between weight, durability, and affordability in a versatile square configuration. Measuring 80" x 80" and weighing just 0.7 pounds, this tarp serves multiple outdoor functions while maintaining packability for backpacking adventures.
What Makes It Stand Out: This footprint’s square shape differentiates it from typical rectangular designs, offering flexible orientation options for various tent shapes and hammock setups. The 190T polyester fabric with PU3000mm waterproof coating provides reliable moisture protection, while high-duty grommets and extended thickened straps enhance durability at stress points. Available in five sizes, it accommodates everything from solo bivys to family tents.
Value for Money: At $18.99, this tarp delivers exceptional value for weight-conscious campers. It bridges the gap between ultralight specialty tarps and budget options, offering ripstop polyester durability at a price point only slightly above basic models. The versatility as a ground cloth, beach mat, or hammock tarp multiplies its utility per dollar spent.
Strengths and Weaknesses: Strengths include ultralight weight, compact packability, multiple size options, square versatility, robust waterproofing, and reinforced construction. The 190T ripstop polyester balances durability with weight savings effectively. Weaknesses include material that may not match the longevity of heavier Oxford cloth or Tyvek alternatives, and the square shape might waste coverage space for some rectangular tent footprints.
Bottom Line: The Frelaxy footprint is an excellent all-rounder for backpackers and car campers seeking lightweight versatility without premium pricing. Its thoughtful design, adequate waterproofing, and size options make it a smart choice for most three-season camping scenarios, particularly for those who value adaptability across different shelter systems.
10. Modern Grizzly Ultralight Camping Tarp, Backpacking Tarp, Tyvek Sheet, Tyvek Tent Footprint, Tyveks House Wrap, Tent Flooring, Tyvekes Ground Cloth, Camping Fly, Multiple Sizes

Overview: The Modern Grizzly Ultralight Camping Tarp employs Tyvek house wrap technology to deliver robust ground protection in a minimalist package. Weighing 8 ounces and measuring 5x8 feet, it provides essential coverage for two-person tents while maintaining ultralight credentials for serious backpackers.
What Makes It Stand Out: This tarp leverages Tyvek’s unique properties: waterproof yet breathable construction that blocks ground moisture while preventing condensation buildup. The material’s exceptional tear and puncture resistance ensures longevity across abrasive terrain. Designed specifically for two-person tent footprints, it creates an optimal barrier against dirt, mud, and debris while adding insulation from cold ground.
Value for Money: At $34.99, this tarp sits at the higher end of the Tyvek market but justifies its price through superior sizing for two-person shelters and enhanced durability. The 8-ounce weight remains competitive for ultralight gear, and Tyvek’s longevity means fewer replacements compared to cheaper polyester alternatives. It’s an investment for frequent backpackers rather than occasional campers.
Strengths and Weaknesses: Strengths include durable Tyvek construction, breathable waterproofing, ideal two-person tent dimensions, ultralight packability, and excellent abrasion resistance. The material effectively stops water flow while allowing air circulation. Weaknesses include a premium price point, potentially noisy crinkly texture, limited aesthetic options, and a size that may prove excessive for solo hikers seeking minimalism.
Bottom Line: The Modern Grizzly tarp is a premium choice for dedicated ultralight backpackers using two-person tents who prioritize technical performance over cost savings. While casual campers might find the price steep, frequent adventurers will appreciate the durable, breathable protection that Tyvek uniquely provides, making it worth the investment for extended backcountry use.
What Exactly Is an Ultralight Tarp Tent?
An ultralight tarp tent occupies the sweet spot between a simple flat tarp and a fully enclosed backpacking tent. Typically weighing between 8 and 20 ounces, these shelters use trekking poles or natural anchors for support, employ advanced fabrics like silicone-impregnated nylon or Dyneema Composite, and prioritize modularity over features. Unlike traditional tents with dedicated poles and freestanding structures, tarp tents embrace the philosophy that your shelter should adapt to the environment rather than forcing the environment to accommodate your shelter.
The defining characteristic is the hybrid nature—offering more weather protection and bug defense than a basic tarp while remaining significantly lighter and more versatile than conventional tents. For fastpackers, this means you can pitch a storm-worthy shelter in under two minutes or reconfigure it into an open-air sunshade during a midday break, all without breaking stride.
Why Fastpackers Are Embracing the Tarp Tent Revolution
The Speed-Weight Connection
Every pound on your back translates to roughly 2-3 seconds slower per mile, according to biomechanical studies on loaded running. When you’re trying to maintain a 15-minute mile pace over marathon distances, that adds up fast. A traditional ultralight tent might weigh 2-3 pounds; a tarp tent slashes that by 60-70%. But the real magic isn’t just the weight savings—it’s the packability. Tarp tents compress to the size of a water bottle, allowing you to use a smaller, lighter pack that sits tighter to your body, reducing oscillation and improving running economy.
The Minimalist Philosophy
Fastpacking isn’t just about moving quickly; it’s about decision-making efficiency. Tarp tents force you to engage with your environment actively. You become skilled at reading terrain, predicting weather, and selecting optimal campsites—skills that make you a faster, safer traveler overall. This mental shift from passive gear reliance to active environmental awareness is perhaps the most valuable benefit, even if it comes with a steeper learning curve.
Key Design Variations Explained
Flat Tarps vs. Shaped Tarps
Flat tarps are rectangles or squares that offer infinite pitching configurations but require advanced skills to achieve weatherproof shapes. Shaped tarps, sometimes called “catenary cut” tarps, have curved edges and pre-determined pole placements that simplify pitching and improve wind performance. For fastpackers, shaped tarps often make more sense because they reduce setup time—a critical factor when you’re racing daylight or an incoming storm.
Single-Wall vs. Hybrid Construction
Single-wall tarp tents combine the rainfly and canopy into one layer, saving weight but requiring careful condensation management. Hybrid designs add partial inner nets or bathtub floors that can be deployed separately, giving you flexibility to go floorless in dry conditions or add protection when bugs or ground moisture become issues. The hybrid approach aligns perfectly with fastpacking’s adaptability requirement.
Floorless vs. Partial Floor Designs
Floorless designs save significant weight and allow you to cook under shelter during storms, but they expose you to ground moisture and crawling critters. Partial floor designs—typically a small bathtub floor that covers just your sleeping area—offer a compromise. Some fastpackers pair floorless tarps with a lightweight bivy sack, creating a modular system that weighs less than an integrated floor but provides full protection when needed.
Critical Features That Make or Break Your Shelter
Fabric Technology and Denier Ratings
Denier measures fiber thickness, but it’s not the whole story. A 15D silicone-impregnated nylon can be more durable than a 20D polyurethane-coated fabric because silicone doesn’t degrade with UV exposure and maintains tear strength better. For fastpacking, look for fabrics in the 10D-20D range with ripstop grids. Anything lighter sacrifices too much durability; anything heavier adds unnecessary ounces.
Waterproofing: Hydrostatic Head Explained
Hydrostatic head (HH) ratings indicate water column pressure resistance. While 1,200mm is technically “waterproof,” tarp tents need higher ratings because wind-driven rain creates much higher pressure. Aim for 3,000mm+ for the main canopy and 5,000mm+ for floors if you choose a design with one. But remember: waterproofing is meaningless if seams aren’t properly constructed and sealed.
Guy-Out Points and Reinforcements
More guy-out points equal more pitching versatility and better wind stability. Look for tarps with mid-panel tie-outs in addition to corner and edge points. Critical detail: reinforcement patches should be bonded or sewn with bar tacking, not just simple stitching. Stress points fail catastrophically in storms, and field repairs are never as strong as factory construction.
Seam Construction and Taping
Flat-felled seams are strongest but add weight. Taped seams are standard, but tape quality varies dramatically. The best tarp tents use seam sealing as a secondary measure, not the primary waterproofing method. Some manufacturers use welded seams on Dyneema fabrics, which are superior but expensive. For fastpacking, consider that seam failures often happen when you’re most exhausted—reliability trumps weight savings here.
The Material Science Behind Ultralight Performance
Silnylon vs. Dyneema Composite Fabrics
Silnylon (silicone-impregnated nylon) stretches when wet, which can sag overnight but also absorbs wind shock, reducing tear risk. It packs small and costs less. Dyneema Composite Fabrics (DCF) are waterproof, don’t stretch, and are incredibly strong for their weight, but they’re crinkly, expensive, and can be punctured more easily by sharp objects. For fastpacking, DCF’s weight savings and quick-drying properties are compelling, but silnylon’s durability and lower cost make it the practical choice for most.
PU Coatings and Their Limitations
Polyurethane coatings add weight, degrade faster, and can delaminate. They’re cheaper and allow tape adhesion, which is why many budget ultralight shelters use them. However, for serious fastpacking, PU-coated fabrics represent a false economy. They’ll need replacement sooner and perform poorly in extended wet conditions. Silicone coatings are superior in every way except cost and seam sealing difficulty.
Emerging Materials on the Horizon
Keep an eye on hybrid silicone-PU coatings that aim to combine the best of both worlds, and ultra-high-molecular-weight polyethylene (UHMWPE) variants that promise Dyneema-like performance at lower costs. While not mainstream yet, these materials will likely dominate the next generation of ultralight shelters.
Mastering the Setup: Skills That Save Time
The A-Frame Configuration
The classic A-frame is fastest to pitch but offers limited interior space. Use this in fair weather or when you need a quick lunch shelter. Key technique: stake the rear first, then raise the front trekking pole to tension. This creates a taught pitch in under 60 seconds. Practice until you can do it blindfolded—muscle memory is crucial when you’re cold, tired, and losing light.
Pyramid and Mid Setups
Pyramid pitches (using a single center pole) excel in wind and snow but require precise stake placement. The trick is creating a perfect square or hexagon base, then tensioning from the center outward. For fastpackers, this configuration works best when you can use your pack as the center support, saving you from collapsing a trekking pole to the right height.
Pitching in Adverse Conditions
In wind, pitch low and aerodynamic, orienting the narrowest profile into the gusts. In heavy rain, create a steep pitch to shed water quickly—shallow angles allow water pooling and eventual collapse. Always carry extra guyline and practice the trucker’s hitch for adjustable tensioning. Pro tip: tie guylines to your stakes before heading out, saving precious minutes in the field.
Weather Resistance: What to Realistically Expect
Rain Protection Strategies
No tarp tent is completely stormproof—it’s about managing exposure. In sustained rain, your biggest enemy is splashback from the ground. Use a groundsheet that extends 6-8 inches beyond your sleeping bag. Pitch lower to the ground than you think necessary; most beginners pitch too high, creating gaps for wind-driven rain. Carry a small sponge to manage interior puddles.
Wind Performance and Pitching Techniques
Wind performance depends more on pitch quality than design. A poorly pitched “wind-worthy” tarp will fail before a well-pitched simple design. Use natural windbreaks, even if it means sacrificing the perfect view. In exposed sites, use rock sacks (fill stuff sacks with rocks) instead of stakes for bomb-proof anchoring. The sound of DCF flapping in wind can be maddening—silnylon is quieter, which matters when you need sleep for recovery.
Condensation Management
Single-wall shelters condense—it’s physics. Minimize it by maximizing ventilation, even if it means getting a little chilly. Pitch with a gap at the foot and head ends. Never pitch with the door facing into the wind; create cross-ventilation instead. Carry a small microfiber towel to wipe down the interior in the morning. Some fastpackers sleep with their shell layers inside their sleeping bag to keep them dry from condensation.
The Weight vs. Durability Equation
Understanding the Ultralight Spectrum
There’s ultralight, then there’s stupid light. A 7-ounce tarp might survive a thru-hike with perfect care, but one careless moment with a crampon or thorn bush ends your trip. For fastpacking, aim for the “durable ultralight” category: 10-15 ounces for the shelter itself. This gives you fabric robust enough to handle the occasional scrape against branches or rocky ground without babying your gear.
Repairability in the Field
Carry a comprehensive repair kit: Tenacious Tape for fabric tears, Seam Grip for resealing, and a spare guyline. DCF repairs are trickier—requires DCF-specific tape and can’t be sewn easily. Silnylon can be field-sewn and resealed. Practice repairs at home; trying to figure it out while hypothermic is a recipe for failure. The best fastpackers can patch a significant tear in under 10 minutes.
Longevity Expectations
A quality silnylon tarp tent should last 2,000-3,000 miles of trail use. DCF might last longer if you avoid punctures, but the material is newer and long-term data is limited. UV exposure is the silent killer—never store your tarp in direct sunlight when not in use. Fastpackers who log high miles should budget for shelter replacement every 1-2 seasons if they’re doing 500+ miles annually.
Financial Investment: Budgeting for Quality
The Price-Weight Ratio
Expect to pay $200-$400 for a quality silnylon tarp tent and $500-$700 for DCF. The weight savings of DCF (typically 4-6 ounces) costs about $50-75 per ounce saved. For competitive fastpackers, that investment makes sense. For recreational fastpackers, silnylon offers better value. Factor in that DCF holds resale value better—it’s a consideration if you upgrade frequently.
When to Invest vs. When to Save
Spend money on the main canopy—this is your primary weather protection. Save money on accessories like stakes and stuff sacks. DIY carbon fiber stakes cost pennies compared to titanium and weigh nearly the same. Your first tarp tent should be mid-priced; learn what features matter to you before dropping top dollar on a premium model.
Hidden Costs: Stakes, Guylines, and Accessories
Budget an extra $50-$100 for stakes (you’ll need 6-10 quality ones), guylines (replace the cheap factory lines with reflective cord), and a groundsheet. Many fastpackers use polycryo plastic sheeting—it’s cheap, light, and surprisingly durable. Don’t forget the weight of these accessories; titanium stakes might cost more, but they save ounces that add up over 100-mile days.
Skill Development: Are You Ready?
Learning Curve Assessment
Be brutally honest: if you’ve never tarp camped, your first trip shouldn’t be a remote 50-mile push. Start with car camping, then progress to overnighters in familiar terrain with good weather windows. The learning curve is steeper than tent camping—you’re trading convenience for weight savings. The skills are learnable, but they require intentional practice.
Practice Protocols Before Your First Trip
Set a goal: pitch your tarp 20 times in different configurations before your first fastpacking trip. Time yourself. Practice in your backyard during rain so you understand water behavior. Learn to pitch by headlamp. The best fastpackers can set up their shelter in complete darkness in under 90 seconds without compromising weather protection.
Common Beginner Mistakes
Pitching on low ground (first to flood), using stakes that are too short (pull out in wind), and creating inadequate tension (sags and flaps). The biggest mistake? Not practicing enough. Your shelter is your insurance policy—would you trust an untested parachute? Treat your tarp tent with the same respect.
Safety Considerations and Risk Management
Site Selection Fundamentals
The “perfect” fastpacking campsite isn’t scenic—it’s safe. Avoid ridge tops (lightning), valley bottoms (cold air pooling), and anywhere water flows during rain. Look for slight elevation, natural windbreaks, and good drainage. In bear country, floorless designs require impeccable food storage practices since you’re sleeping where you cook. Always have an escape plan: know where the nearest natural shelter is if your tarp fails catastrophically.
Wildlife Encounters Without a Full Tent
Mice love floorless shelters. Store your pack on your sleeping pad, not the ground. In snake country, shake out your sleeping bag before climbing in. The psychological barrier of a tent is real—many fastpackers report needing time to adjust to the exposed feeling. Earplugs help. Remember: animals are more afraid of you, but don’t be complacent.
Emergency Protocols
Your tarp is your primary emergency shelter, but carry a backup: an emergency bivy sack adds 3-4 ounces but could save your life. Know the signs of hypothermia and have a plan to use your tarp as a wrap-around emergency shelter. In severe weather, prioritize getting sheltered over perfect pitching—a sloppy pitch that keeps you dry is better than a perfect pitch that takes 20 minutes in a downpour.
Maintenance and Care for Longevity
Cleaning Procedures
Never machine wash. Use a bathtub with mild, non-detergent soap (Nikwax Tech Wash). Rinse thoroughly and air dry completely. DWR coatings can be refreshed with spray-on treatments, but silicone-impregnated fabrics don’t need this. Clean your tarp every 300-500 miles or after any trip with significant mud or pollen exposure.
Storage Best Practices
Store loosely stuffed, never compressed, in a cool, dry place. UV degradation is cumulative—even indoor light through windows damages fabrics over time. Use the oversized storage sack that comes with quality tarps, or make one from an old pillowcase. Never store damp; mildew destroys waterproof coatings and creates health hazards.
Field Repairs 101
Clean the area with an alcohol wipe, apply Tenacious Tape to both sides of a tear, then seam seal the edges. For stake loops that pull out, tie a bowline knot through the reinforced area as a temporary fix. Carry a sail needle and dental floss for sewing repairs—it’s stronger than regular thread. Practice these repairs before you need them.
Customization and DIY Modifications
Adding Linelocs and Guy-Out Points
Most tarp tents benefit from additional mid-panel tie-outs. Use bonded reinforcement patches (available from gear repair companies) and Lineloc 3 adjusters. This allows micro-adjustments without re-staking. For fastpackers, adding a single mid-panel tie-out on each side can reduce setup time by 30 seconds while improving storm-worthiness.
Integrating Bug Protection
Sew or bond no-see-um netting to the perimeter of your tarp, creating a hanging bug skirt. Or use a separate head net and treat your clothing with permethrin. Some fastpackers carry a small, ultralight bivy with bug netting for the sleeping bag area only, saving weight over full enclosure while providing bite protection where it matters most.
Creating Modular Systems
The ultimate fastpacking setup is modular: tarp + removable inner net + groundsheet. This allows you to carry only what conditions demand. Use small carabiners or hooks to attach components quickly. Color-code your guylines and stake loops—use red for critical tension points, green for secondary adjustments. This speeds up pitching when you’re exhausted.
Tarp Tents vs. Traditional Shelters: Making the Choice
When a Tarp Tent Makes Sense
If you’re logging 25+ mile days consistently, value weight savings over convenience, camp primarily in three-season conditions, and enjoy developing backcountry skills, tarp tents are ideal. They shine in environments with predictable weather patterns and abundant natural anchors (trees, rocks). They’re also perfect for fastpackers who use their shelter as a midday sun/rain shelter during long food breaks.
When to Stick with Conventional Tents
If you frequently camp above treeline in exposed conditions, suffer from arachnophobia or need psychological enclosure, or fastpack with a partner and need space efficiency, traditional tents may serve you better. Also consider your sleep system: if you use a down quilt, the splash protection of a tent’s floor becomes more valuable. Fastpacking in regions with aggressive insects or unpredictable weather might warrant the weight penalty of a tent.
The Hybrid Approach
Many experienced fastpackers own both: a tarp tent for solo, high-mileage pushes and a lightweight tent for partner trips or questionable weather windows. This is the most versatile but expensive approach. Consider it an investment in your safety and comfort across different adventure types.
Seasonal Considerations Through the Year
Three-Season Fastpacking
This is tarp tent prime time. Focus on ventilation and bug protection. Learn to identify afternoon thunderstorm patterns in your region and plan campsites accordingly. In humid climates, prioritize pitches that maximize airflow—even if it means a slightly less protected site. Your ability to dry gear overnight directly impacts your next day’s performance.
Shoulder Season Strategies
Spring and fall bring frost and unpredictable storms. Pitch lower to the ground and consider adding a partial floor or bivy. Carry extra stakes for snow loading. DCF performs better in snow because it doesn’t stretch, but silnylon’s flexibility can prevent catastrophic failure in heavy, wet snow. Know when to bail—tarp tents aren’t four-season shelters, and pushing limits in shoulder seasons requires expert-level skills.
Winter Limitations
Most tarp tents aren’t suitable for true winter conditions. Snow loading, spindrift, and extreme wind exceed their design parameters. If you venture into winter fastpacking (a highly specialized pursuit), look for pyramid designs with reinforced panels and plan to build snow walls for protection. The weight savings become less critical when you’re carrying winter gear anyway.
Packing and Integration with Your Fastpacking Kit
Stuff Sack Strategies
Ditch the factory stuff sack—it’s usually heavier than necessary. Use a Dyneema roll-top bag that doubles as a pillow. Pack your tarp at the top of your pack for quick access during unexpected weather. Some fastpackers pack their tarp in an outside pocket, but this exposes it to abrasion and UV damage. Internal packing is safer.
Multi-Use Gear Integration
Your trekking poles are your tent poles. Your pack can be a center support. Your rain jacket can supplement wind protection at the tarp’s entrance. The best fastpacking systems have 3-4 uses per item. When evaluating a tarp tent, ask: “What else can this do?” Can it be a pack cover? A sun shelter? A rain collector? Versatility equals weight savings.
Weight Distribution Principles
A 12-ounce tarp tent allows you to use a 20-liter pack instead of 30 liters. That weight savings compounds: smaller pack, less frame material, fewer pockets. Distribute the tarp’s weight near your back’s center of gravity. Don’t compress it excessively—a loosely packed tarp fills dead space in your pack better and reduces stress on the fabric.
Frequently Asked Questions
1. How much should I expect to spend on my first ultralight tarp tent?
A quality entry-level silnylon tarp tent costs $200-$300. This gets you a reliable shelter from a reputable cottage manufacturer with proper seam sealing and reinforcements. Avoid budget options under $150—they typically use inferior coatings and stitching that fail when you need them most. Consider this a long-term investment; a well-maintained tarp tent lasts multiple seasons.
2. What’s the realistic learning curve for someone transitioning from traditional tents?
Plan for 3-5 practice sessions in your backyard, followed by 2-3 low-stakes overnighters in good weather. Most people feel competent after 10-15 pitches but won’t achieve “fastpacking speed” (under 2 minutes) until they’ve used the shelter for a full season. The mental adjustment to floorless sleeping takes longer—some fastpackers never fully adapt and add a bivy for peace of mind.
3. How do I handle bugs without a fully enclosed tent?
The most effective solution is a separate head net treated with permethrin paired with a floorless tarp. For full protection, add a hanging bug net skirt or use a partial inner tent. Some fastpackers simply avoid bug season or hike through dawn/dusk when insects are least active. Your sleep system matters too—treating your sleeping bag/quilt with permethrin provides an additional barrier.
4. Can I really stay dry in heavy rain with a tarp tent?
Yes, but it requires proper pitching and site selection. Pitch lower than you think (12-18 inches off the ground at the edges), create steep wall angles, and use a groundsheet that extends beyond your sleeping bag. In sustained rain, you’ll get some splashback, but staying dry is absolutely achievable. The key is practicing in bad weather before your life depends on it.
5. What’s the difference between hydrostatic head ratings for tarps vs. tents?
Tarp tents need higher HH ratings because they lack the structural redundancy of double-wall tents. While 1,500mm might suffice for a tent rainfly, aim for 3,000mm+ for tarp tents. Wind-driven rain creates much higher pressure against a single-wall shelter. Floors (if present) should be 5,000mm+ since they face pressure from your body weight on wet ground.
6. How do I prevent condensation from soaking my sleeping bag?
Maximize ventilation—always pitch with airflow gaps, even in rain. Avoid camping in low-lying areas where cold air pools. Use a sleeping bag with a water-resistant shell fabric, and never breathe inside your bag. Some fastpackers wipe down the tarp interior before bed and again at first light. Accept that some moisture is inevitable; manage it rather than trying to eliminate it completely.
7. Is Dyneema Composite Fabric worth the extra cost for fastpacking?
It depends on your mileage and budget. If you’re logging 500+ miles per season, the weight savings (4-6 ounces) and durability justify the $300+ premium. DCF doesn’t absorb water, so it stays lighter in rain and dries instantly. For occasional fastpackers, silnylon offers better value. The performance difference is real but may not be worth it if you’re only doing a few trips per year.
8. How many stakes do I actually need, and what type works best?
Carry 8-10 stakes minimum, even if your tarp only requires 6. This gives you backups and options for complex pitches. For most terrain, shepherd’s hook titanium stakes offer the best weight-to-holding-power ratio. In loose soil or snow, carry 2-4 wider Y-stakes or use natural anchors. Always stake at a 45-degree angle away from the tarp for maximum holding power.
9. Can I use a tarp tent for fastpacking with a partner?
Yes, but choose a design rated for two people with adequate space. Many “two-person” tarp tents are cramped for two fastpackers with gear. Look for models with 30+ square feet of floor space and two doors/vestibules. The weight savings are less dramatic when split between two people, but the versatility remains. Practice pitching together before your trip—communication is key for fast setup.
10. What are the most common failure points, and how do I prevent them?
Stake loops pulling out, guy-out points tearing, and seam tape delamination top the list. Prevent failures by avoiding over-tensioning, using proper stake angles, and resealing seams annually. Inspect your tarp after every trip, looking for stress fractures in the fabric. The most common user error is pitching too tightly in cold weather—fabrics contract and can tear when temperatures drop significantly overnight.